Renovating the cottage, version 2.0
We bought our second cottage last summer after selling one that we’d owned for 12 years. And which we renovated over 12 long years. So for this new cottage, we were hoping to speed up renovations significantly which would mean that we could enjoy our time at the cottage rather than working on it. We hired our good friend Dan to continue our renovations at our new cottage. Now this is the same Dan who has worked on renovations shows such as the first season of “Game of Homes” so we are very fortunate to have him as both a friend and contractor. Last August he had put in our new kitchen as well as moved walls, levelled floors and all manner of other renovations. I was to be his gopher, aka “go fer”, to make the runs to RONA, to the dump with all the cardboard recycling, paint, operate the saw, as well as be on hand to make design decisions. Dan is fantastic at what he does and is FAST. And he doesn’t stop, even to eat. Well, the good news is that I lost weight and exceeded my Fitbit goals every day for a week. Bad news is that it took me three days to recover from being his helper!
Tiling the backsplash
First job was to tile the backsplash. While Dan made all the cuts, under his guidance I learned how to apply the thinset mortar on the tile and affix to the wall. Apparently a few of the tiles are a bit out of kilter but I can’t tell and it is a cottage after all.
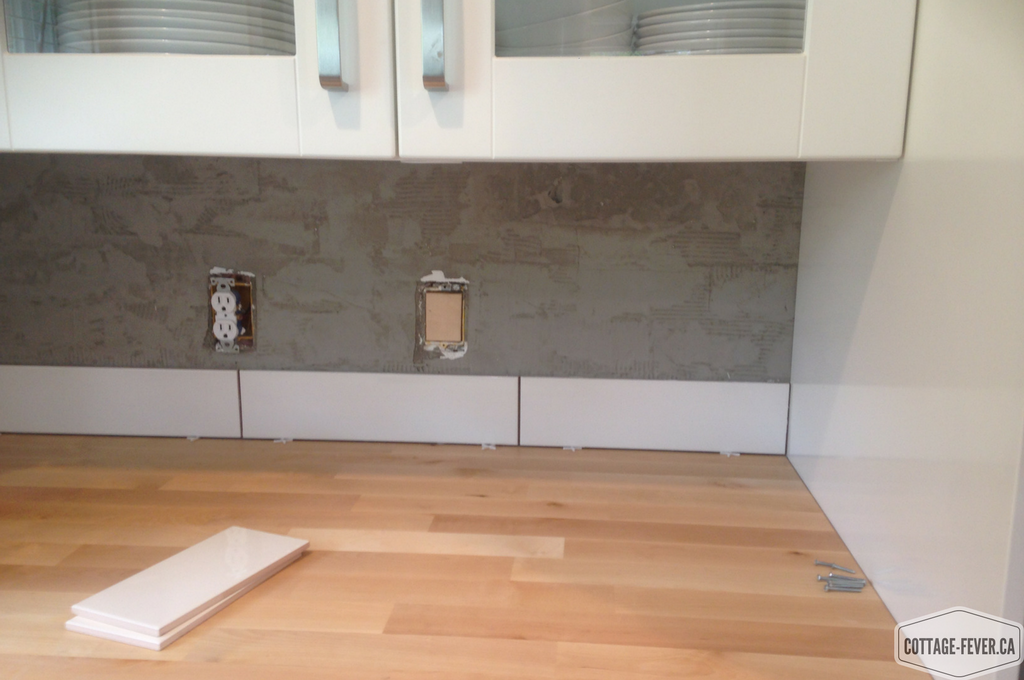
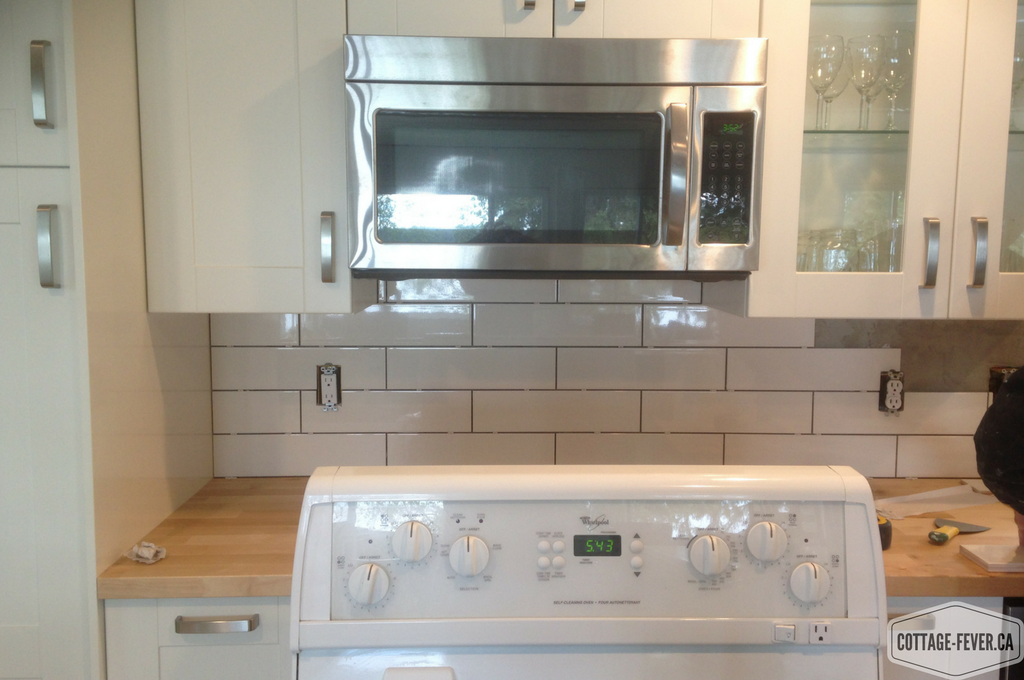
Dan also taught me how to grout but I wasn’t fast enough and the grout was drying out before I could get it applied. I was relegated to sponge duty, coming along behind Dan sponging the grout off the tiles.
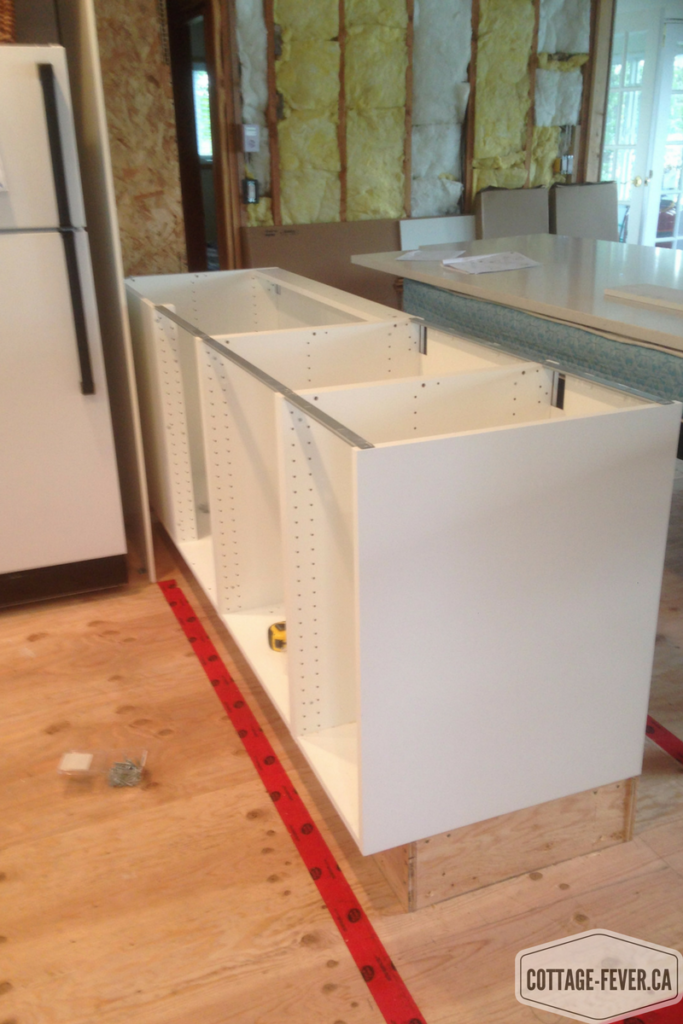
Anchoring the peninsula
Next job was to anchor the peninsula. Last summer, Dan had designed and installed our IKEA kitchen for us. Then we made a last minute design decision (who hasn’t?) to add a peninsula. We thought we could handle this ourselves as Dan had told us what to buy and created a template for the countertop which was to be made out of Caesar stone. I bought and assembled the cabinets. My sons and I made the base out of plywood which we ripped in 6″ strips and then assembled with crosspieces where each cabinet joins together. It was only slightly crooked. We had the caesar stone cut in the city, brought it up on our trailer and then on a snowy winter day tobogganed it down from the parking area on a huge piece of styrofoam. With the help of hoards of people, we carried it in and “dry” fit it in place. But for the life of us, we couldn’t figure out how to properly anchor the peninsula as it kind of floated and we didn’t have a reference point of how to make it perfectly square since nothing in this cottage is square. So this waited until Dan could make another trip back to the cottage. Of course he figured it out quickly by taking the reference off the counter itself and then marking the floor.
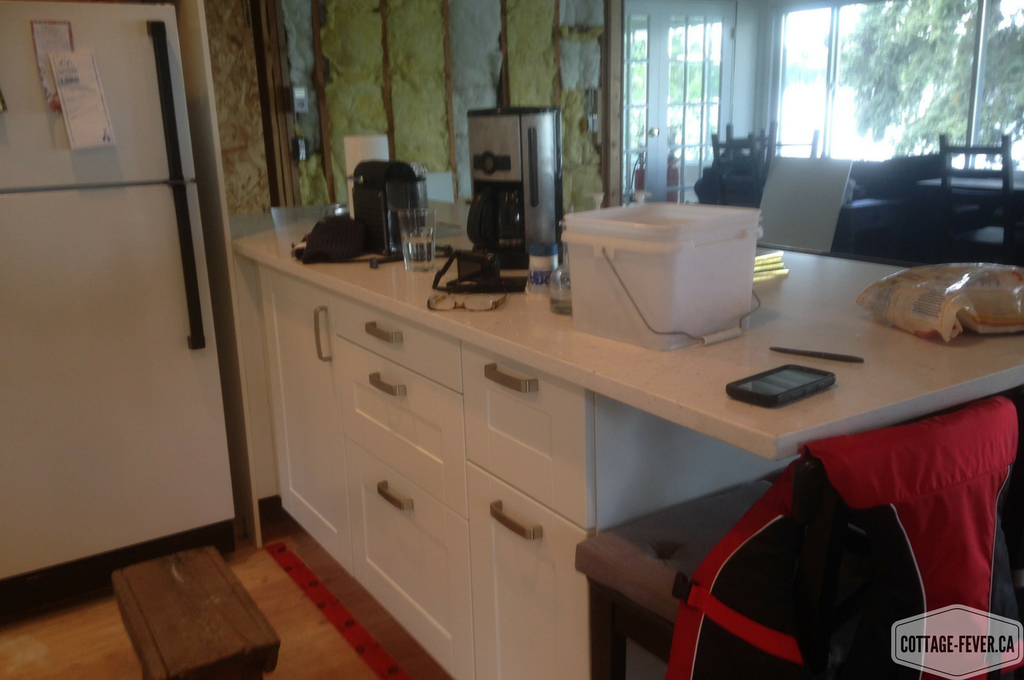
With the help of family who live close by, we were able to shift the 500 pound counter top from the mattress and onto the cabinets. A dab of silicone on each of the high points and the countertop was in place. It’s a showstopper! Six barstools fit comfortably around it and my husband’s long legs fit under it. The end has an extra long overhang just to accommodate his 6’5″ frame.
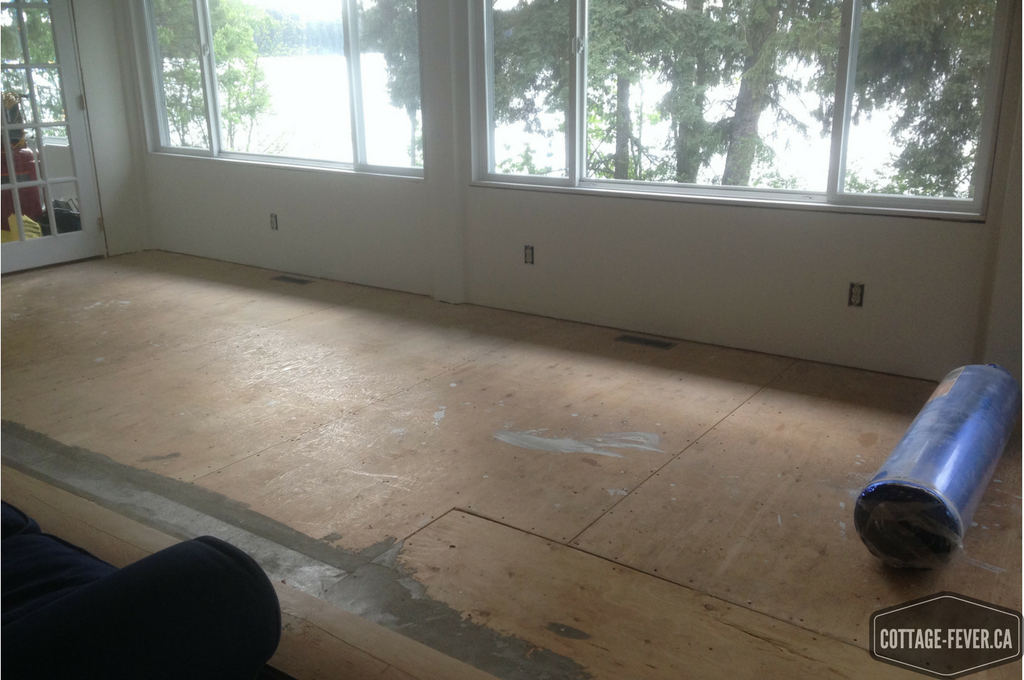
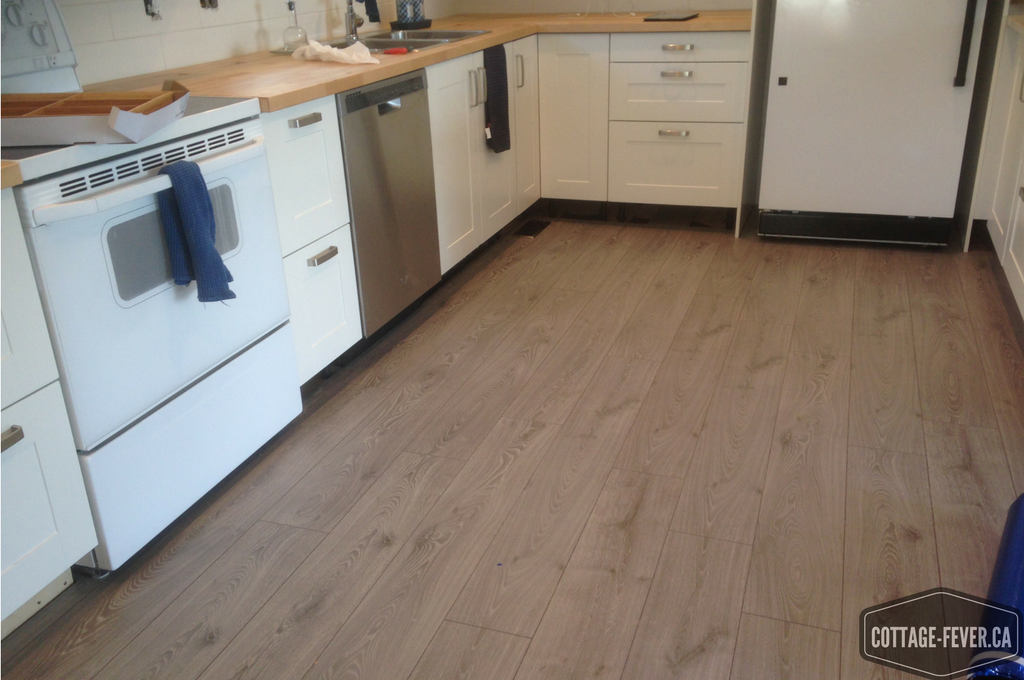
Laying the flooring
Next was the flooring. We had bought and stored the flooring last summer in the garage so it needed to come down into the cottage so Dan could install it. I didn’t want to waste his valuable timing shlepping flooring so I brought it all down. It was a great way to get in my steps on my Fitbit – 15,000! Who needs strength training when you can haul flooring? I was bringing it in to the cottage at almost the same rate as he was laying it.
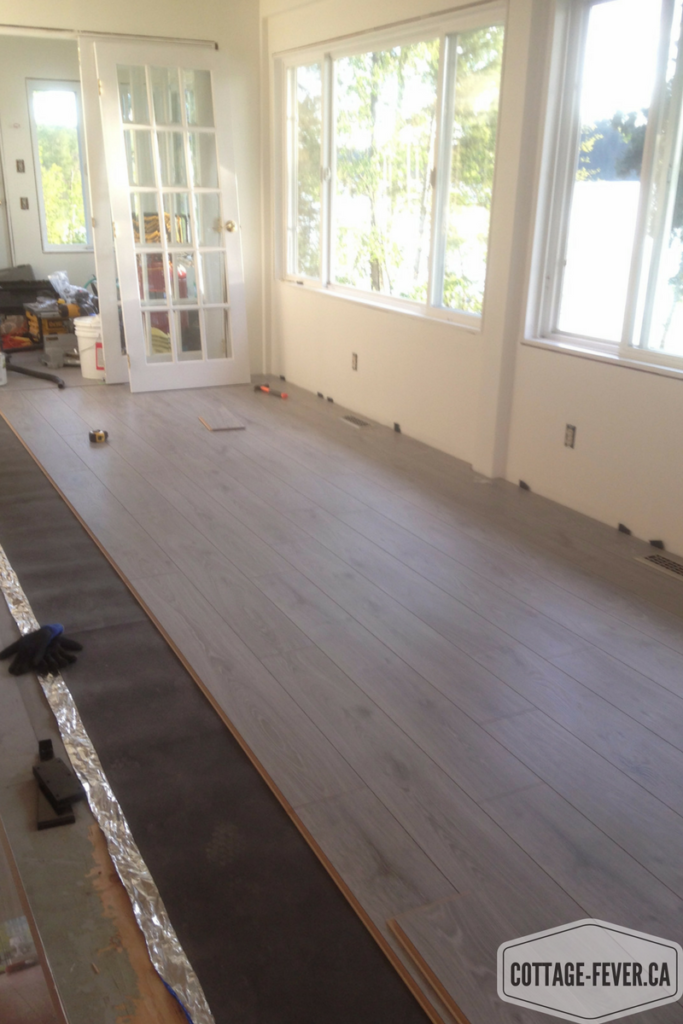
We chose a very durable laminate floor, Kromotex Timeless Oak Grey from Lowe’s that floats, thinking that this would weather the fluctuations in temperature (did you pick up on the pun) as well as the wear and tear of cottage living. We got it on sale at a great price. It’s 12 mm thick which means that it feels more like a solid wood floor and there’s no hollow echo when you walk on it. It also spans subfloor variations better. Hopefully the floors will feel a bit warmer this winter. Dan had installed a subfloor but it had to span an area where a fireplace was removed and nothing in the cottage is level so this was a real benefit. This laminate flooring has an AC (Abrasion Class) rating of 5 which means its suitable for a commercial installation with heavy traffic. Should stand up to my three sons then. When cutting the laminate, use an old blade or one specific to laminate, otherwise it will chew up your good blade.
While it looks like wood, this flooring has a smooth texture which makes it much easier to clean. Floor with the texture of real wood is lovely to look at but all the grooves trap dirt. I just want to go over the floor with my Swiffer Sweeper Wet, not have to get down on my hands and knees. Plus laminate can’t stand up to water so you can’t wash it using a bucket and mop. The grey colour just speaks “lake house” to me and is a nice neutral but a bit more updated than brown flooring.
The weirdest thing happened though. Dan kept getting shocks every time he touched anything metal in the cottage but I wasn’t. At first we thought that it might be because of the tinfoil strips on the underlay but it kept happening when he was no longer using it. So we then attributed it to his shoes and all the laminate dust he was walking through from the saw. Or maybe it’s just his electric personality.
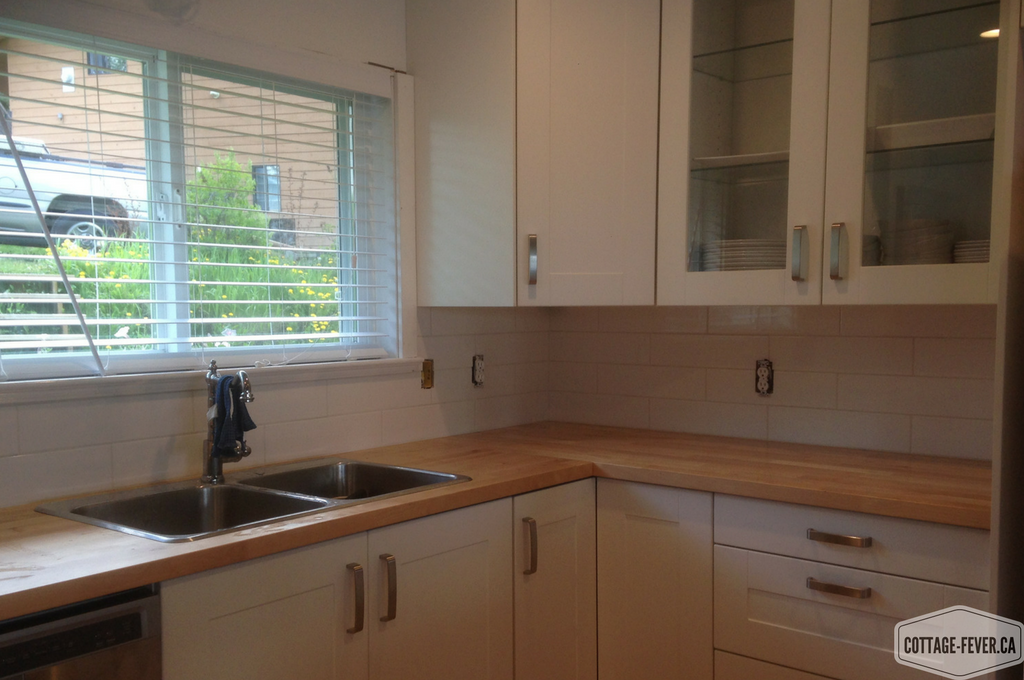
The completed kitchen
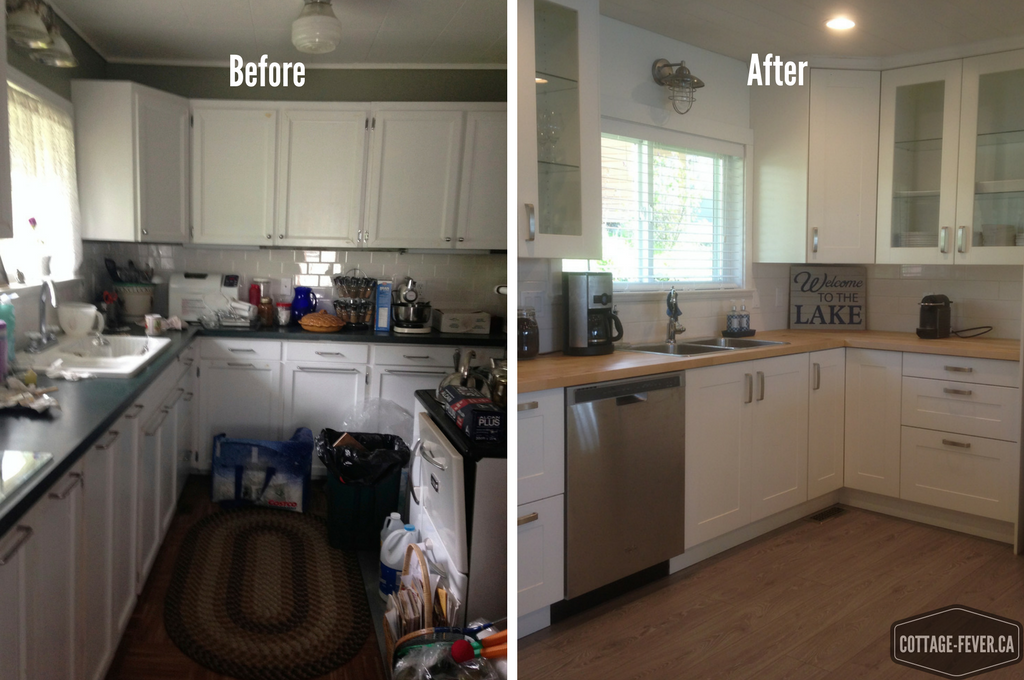
We removed the old kitchen as the cabinets weren’t functional for our needs but they were recycled into another kitchen so they didn’t end up in the land fill. The non-CSA approved wood stove smack in the middle of the kitchen made for a very dysfunctional layout. As did the wall behind it (not shown) blocking the kitchen off from the main living area.
The light over this sink is from Lowes.ca. It’s an outdoor light that was only $36. There was what initially appeared to be a crack in the glass leading to a small hole so I took it back to Lowe’s and exchanged it. The clerk and I went through every box on the shelf of the same light and each of them had that same crack so I figured it must be a part of the design? You get what you pay for. We installed it anyway and so far love it. We don’t notice the crack since it has been installed.
I picked up the “Welcome to the Lake” sign at Winners. The window blinds are from Home Depot. We bought the same blinds for every window that needed privacy. The windows facing the lake have no coverings. The floor register is also from Home Depot. Pretty much everything else is from IKEA. Dan made the kicks just from 1 x 4.
On to the bathroom. But that’s another post.