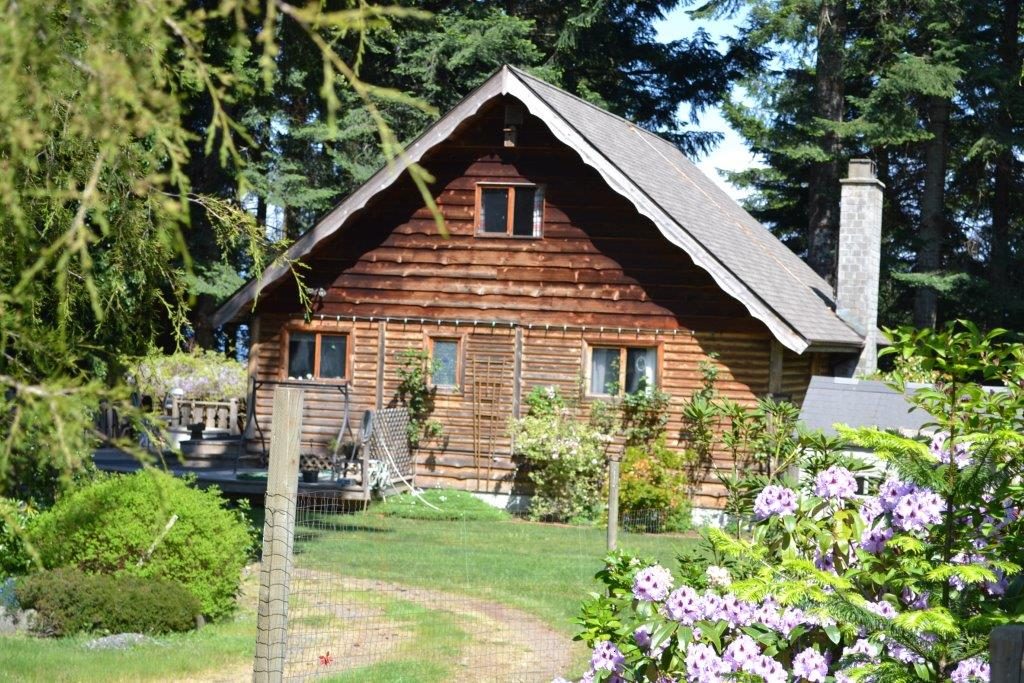
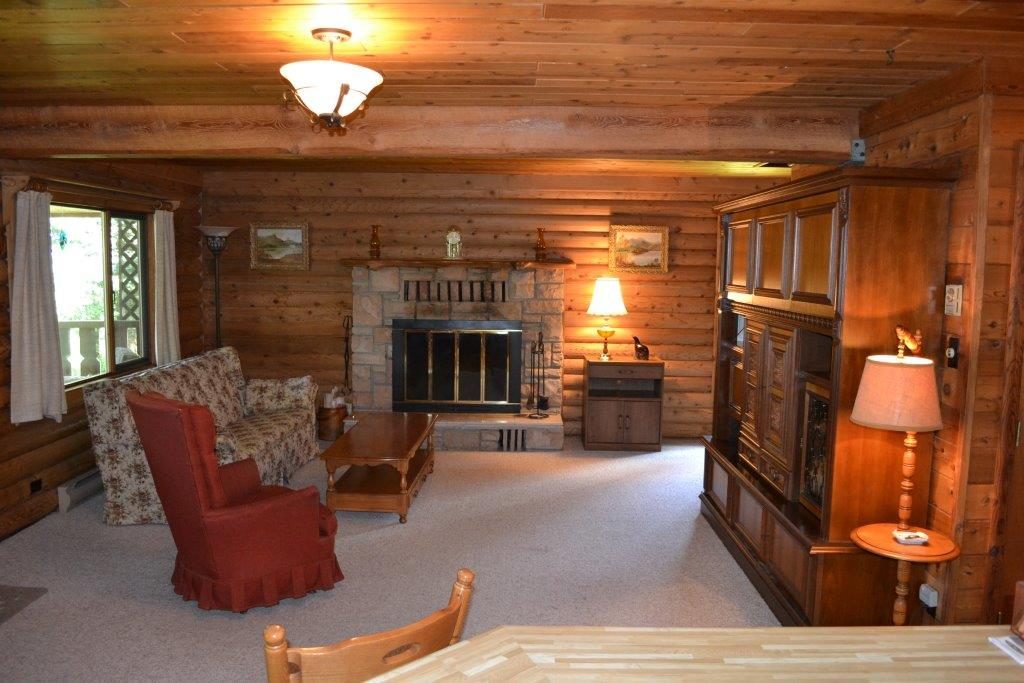
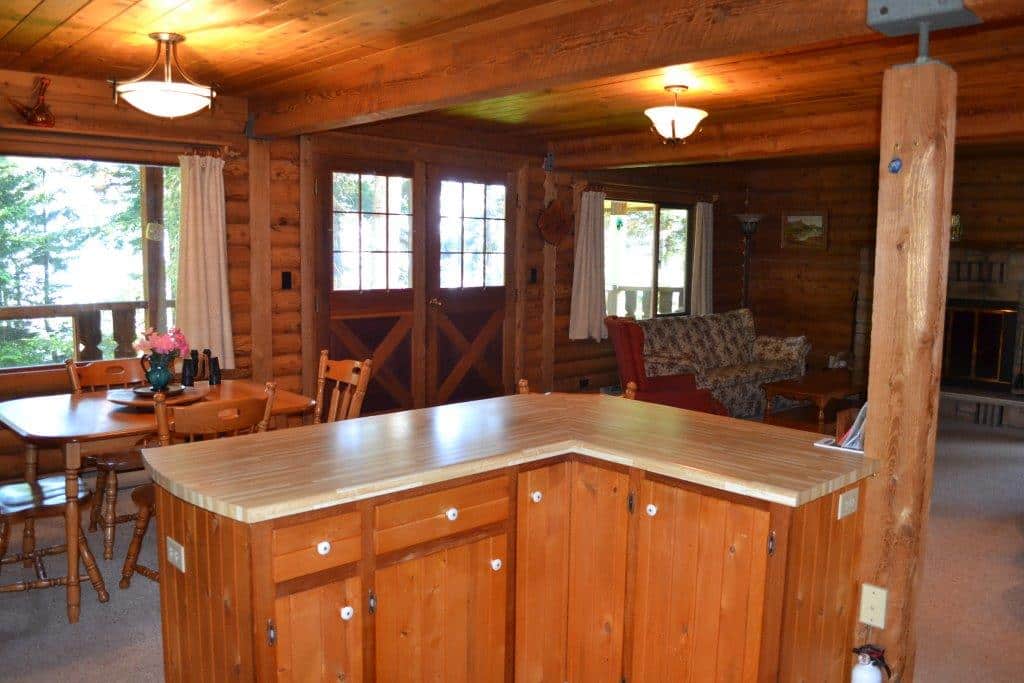
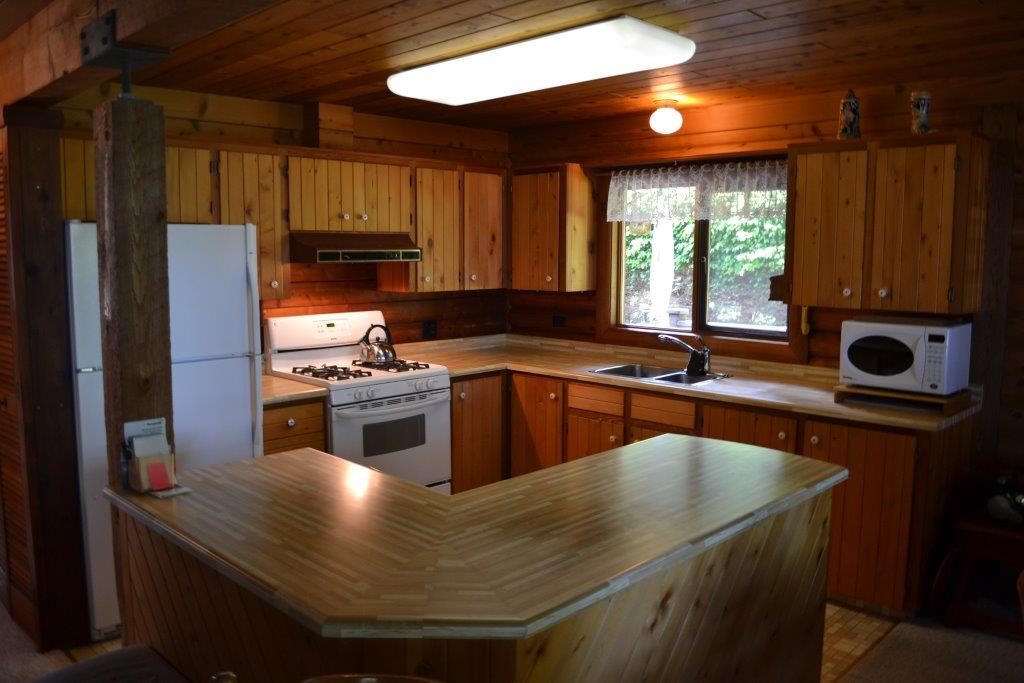
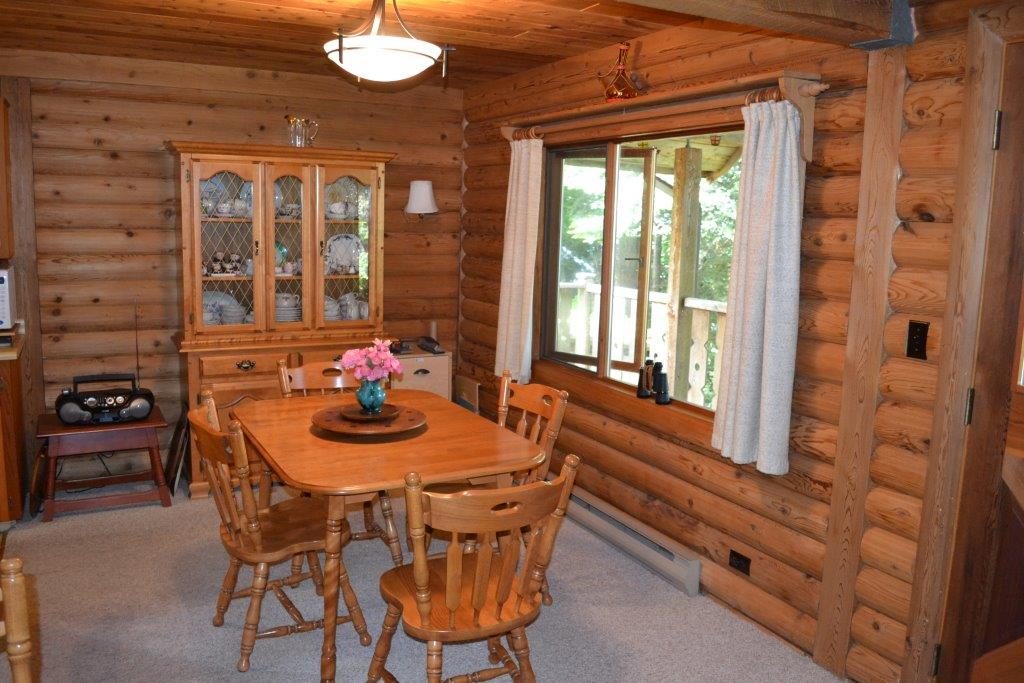
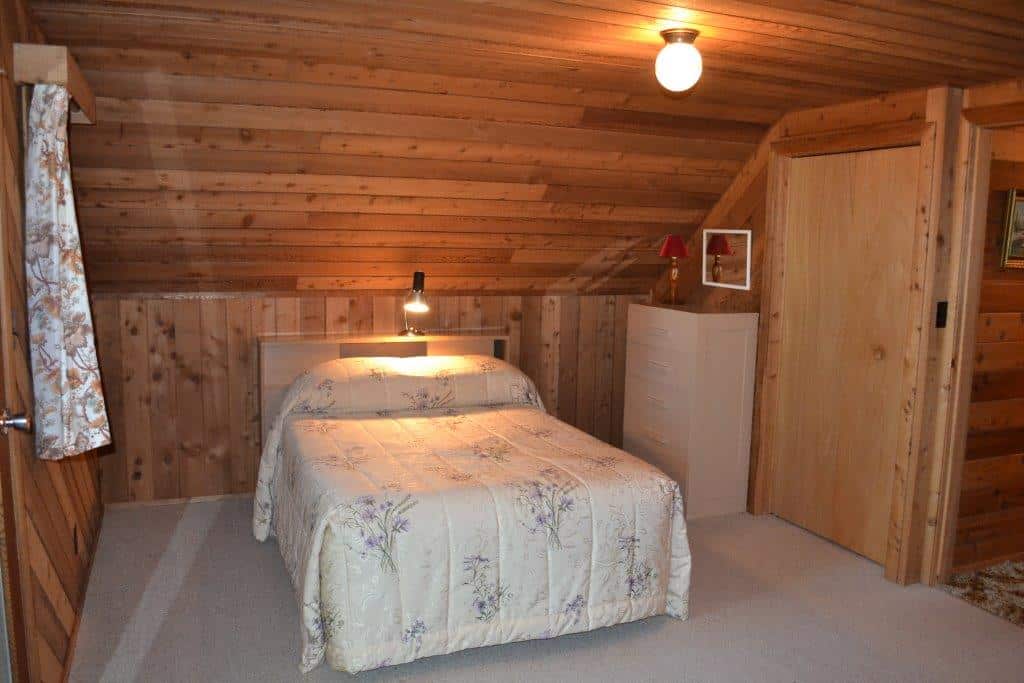
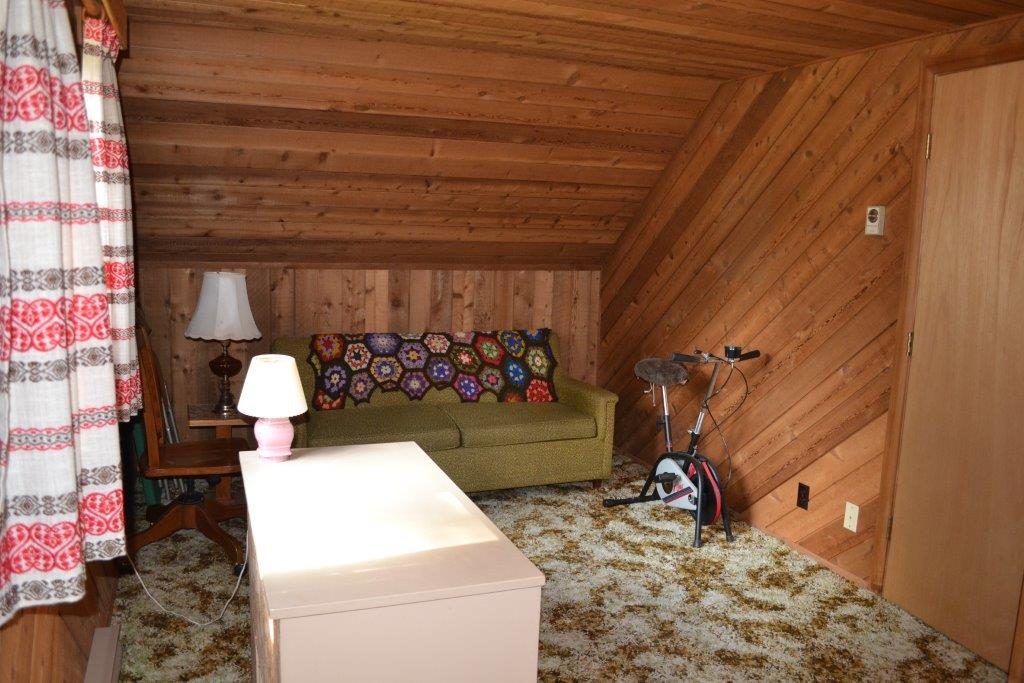
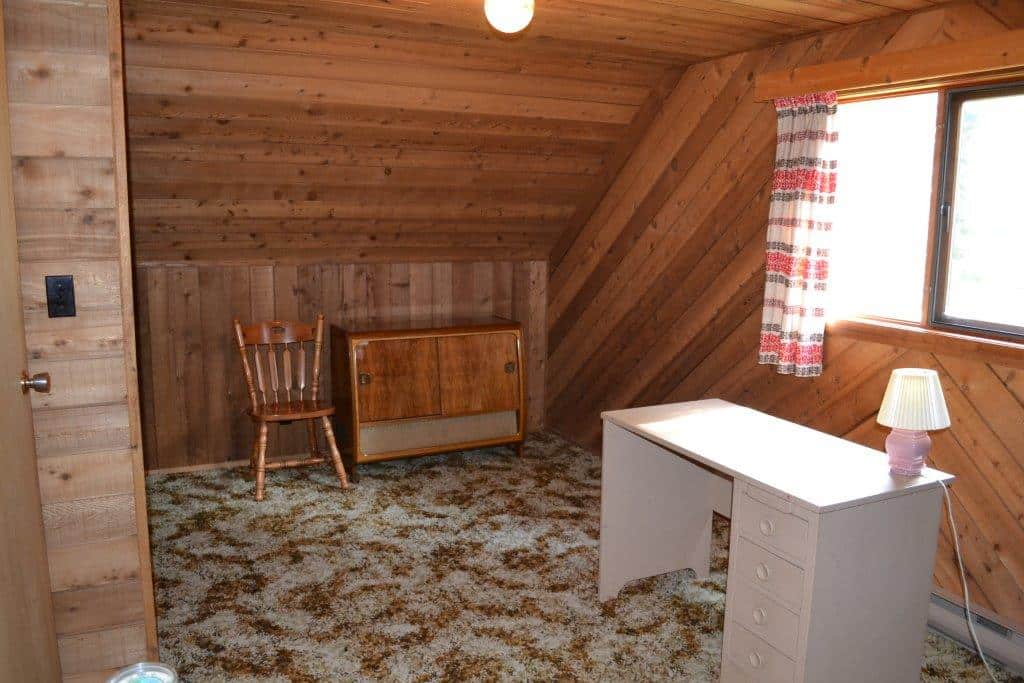
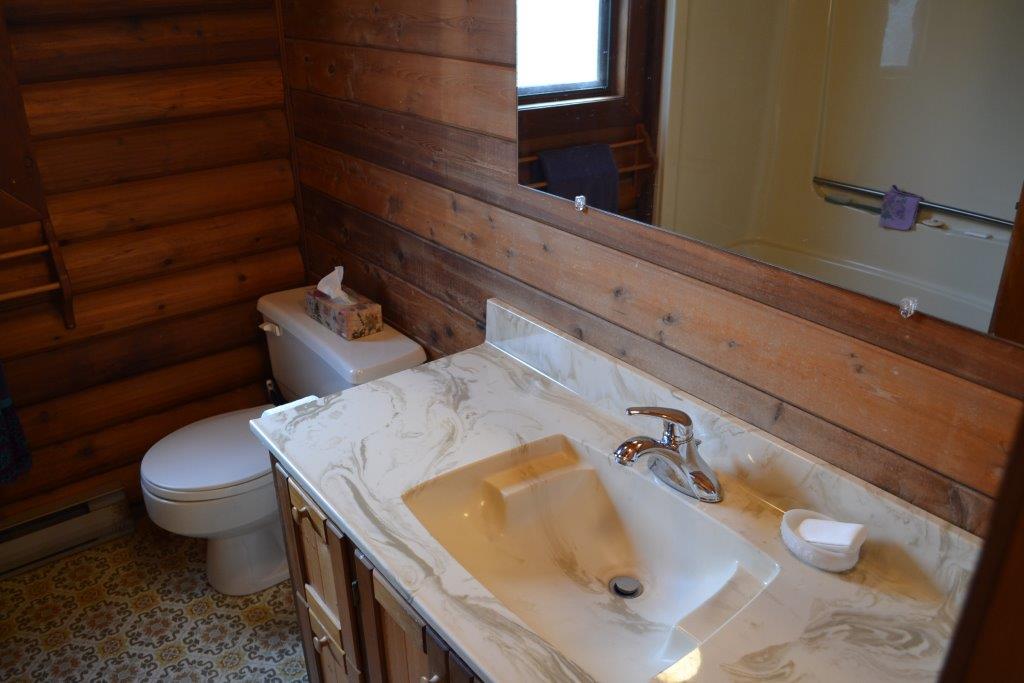
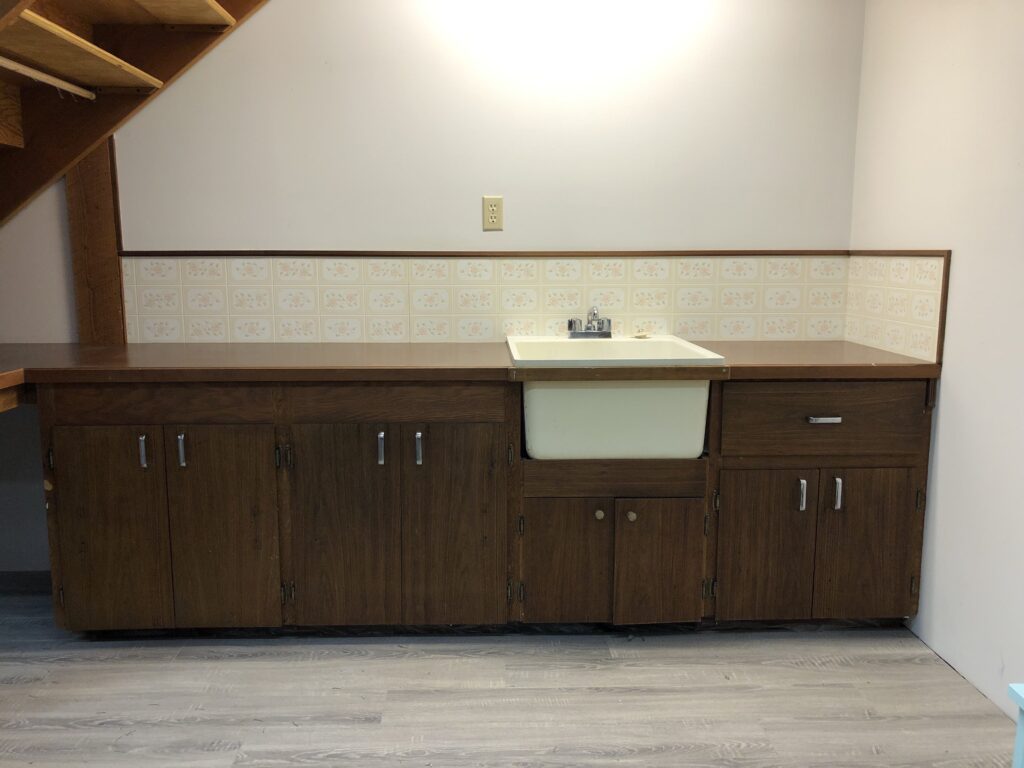
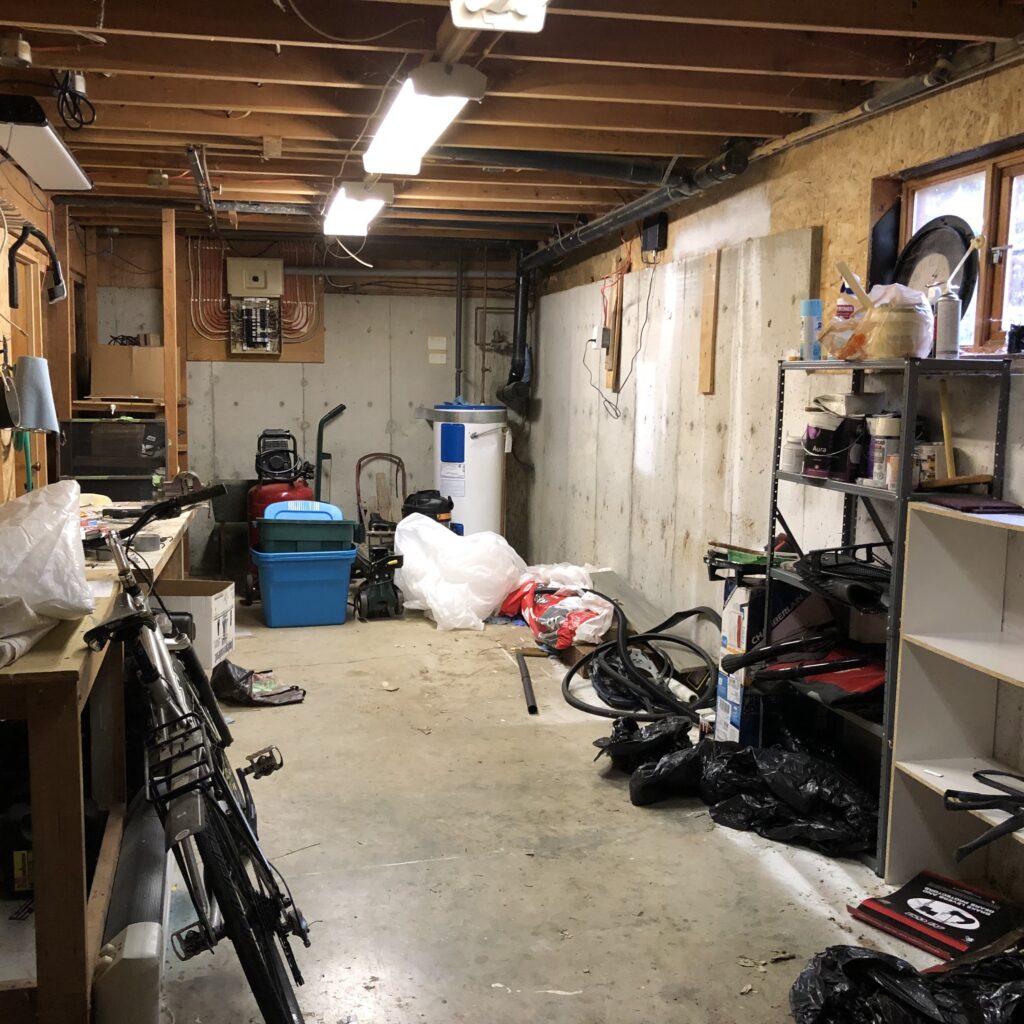
Transforming a dark log cabin into “The Beach Chalet”

You might say that I am an accidental log home owner.  I certainly wasn’t in the market for a one.  It wasn’t even on my radar.  But when the ideal property at the right price turned up during my search for a beach home, I snapped it up.  The original idea was that down the road, the alpine-styled log home could possibly be relocated to the local ski hill, a more obvious location, and then my dream home would be built.  But as often happens, circumstances changed and the cabin was starting to grow on me, so the process of transforming this dark and dated structure into my dream home began (with the help of a great contractor) and “The Beach Chalet” was given a new lease on life.

Now this is the perfect location.  No need to make any changes here!

Before

This was a log kit home built by the original owner 40 years ago.  And it hadn’t been updated since.  Can you see now why I call it a chalet and why I thought it was more suited to a mountain top?

It wasn’t at all set up for my lifestyle.  So how to turn this into my dream beach cottage?  Here were the challenges…

Transforming a dark and dated

The cabin sits on a .6 acre site with direct water access on a mostly private beach.  But there were a few issues to address such as the entry deck being built over the access to the septic tank, making it nearly impossible to pump out.  Did that mean that it hadn’t been pumped out in 40 years?  Yikes!  

My niece once commented that my house “looks really creepy on the outside”.  

After

Stay in The Beach Chalet

A new deck, parking area, pathway to the door but most importantly painting the window frames white and pressure washing the logs has transformed this dark cabin into The Beach Chalet.  

My front door is now a lovely shade of blue.  I always subscribe to the philosophy that your front door should bring you joy when you return home and be a hint of what guests will find inside.  

Still on the list is re-staining the exterior logs but at least the Beach Chalet is much brighter now.  

Living Room - Before

Renovating Log home

The living room was extremely dark.  The light from the one south facing window was completely obscured by the large entertainment unit that the previously owner had left behind.  The dark carpet was removed and all the cedar panelling was painted a warm white to reflect and counteract the coolness of the northeastern light.

Living Room - After

cottagecore

Typically, a room has two focal points – the fireplace and the view.  Now the furniture is positioned to take advantage of both.

Given the proliferation of available fire wood and the inefficiency of the existing fireplace, I had a wood burning insert installed.  Another factor is that with winter wind storms, power is frequently lost so I needed an alternative heat source.  Its catalytic combuster means that very little smoke is produced.  Extending the hearth was a necessity from a safety viewpoint in case any logs roll out.  The Beach Chalet is now warm and toasty as nothing beats the heat generated from a wood fire. 

With only one south facing window in the entire home, I decided to add a matching window on the left side of the fireplace.  This was cut out using a chainsaw!  Nothing like the smell and sound of a chainsaw indoors.  And there is a spectacular view out this window. In fact, all the windows throughout the home have been replaced with higher efficiency ones to increase the comfort level in the winter time.  One of the downsides to a log home, or at least with this one, is that they can be chilly and drafty.  Being on the water, I do tend to get hammered by the wind in the winter time.  But I don’t mind as storm watching is exciting!

While some would say it is sacrilegious to paint over cedar panelling, it had to be done to brighten the space.  I knew I wanted white but it had to be the perfect counterbalance to the cool Northeast light that fills the space so I opted for Benjamin Moore’s Simply White which has a warm undertone.  Every panelled wall and ceiling, as well as window frames were painted.  Not even the stone on the fireplace was spared.  And what an impact that alone created.  Now light bounces around, serving to brighten the space.  I used a satin finish on the ceiling which the paint store clerk questioned as a matte finish is typically used in this application.  When the sparkling light is reflected on it, off the ocean, it’s just magical.

For flooring, I chose a wood-style, wide plank laminate as you wouldn’t believe the amount of sand that gets tracked into the house.  It would destroy an engineered wood floor.  Normally I wouldn’t suggest a grey floor for a client but in this case it mimics the beach seen from the window, which brings the outside in—such an important component of Biophilic Design, having a positive impact on one’s mental health.

A painted vintage buffet now sits where the previous owner’s entertainment was located.  As most often with renovations, there are surprises.  Not having received the final occupancy permit over 40 years ago turned out to be one of them!  The home inspector made me raise the height of my stair railing which is still on the list for a prettier replacement.  If you’d like to learn more about painting your own furniture, check out this blog post.  

French Doors - Before

My primary goal with this renovation was to maximize the natural light. so the 1/2 window french doors had to go, to be replaced by full glass ones.  Removing the valance over all the windows helped to visually heighten the ceilings.  With privacy not an issue, there was no need for window coverings which would have blocked some of the natural light. In the evenings, I enjoy seeing the lights of the town 37 km across the Salish Sea, directly opposite me.

French Doors - after

I just love guests’ reactions when they come around the corner from the mudroom and see this view for the first time.  It takes their breath away.  Mine too!

Kitchen - Before

This photo was taken on a sunny day with all the lights turned on and yet it’s still so dark.  The cabinets offered limited storage options and functionality.  They found new life with a lovely young couple who repurposed them, so they didn’t end up in the landfill.

Kitchen - After

Previously, the only way I could see someone arriving or look out over the front garden was by going down the hallway into the mudroom.  By adding this nautical inspired round window and lining it up with the window in the mudroom, I have added the view and increased the amount of light flowing into the kitchen. An integrated dishwasher means that it blends in with the cabinetry, reducing visual clutter.

The aqua backsplash in a herringbone pattern makes a strong visual statement. Having a slight wave in it, echoes the ocean outside.   As the logs read as  orange, blue was a natural counterpoint as it’s on the opposite side of the colour wheel, making the two colours complementary.  And it adds a bit of whimsy, always welcome in any room!  I even managed to find small matching aqua appliances.

Designing around a post is challenging to say the least.  I experimented with ten different floor plans to see which one would work best.  Seating at the counter was a priority as I do like to entertain casually but an island would just cut off too much space so the post was incorporated into a peninsula.  

Curving the countertop allowed for easy flow from the hallway and doesn’t obstruct access to the basement door.  As you can see, its polished surface helps to bounce more light, as does the stainless steel refrigerator.  

Dining Room - Before

Maximizing the dining space for flow, functionality and storage was a priority.

Dining Room - After

The old windows had a casement opening which meant that the frames had to be larger and there was a vertical line visually making them appear smaller.  By choosing a fixed window, it feels like they’re much larger when in fact the opening is the same size.  So important when maximizing a water view.  

Upper glass cabinet fronts reflect the light coming in the windows, making the space brighter.  I just love the wicker chairs as they lend a resort feel to the space.

primary bedroom - before

Dark panelling can make a room feel much smaller than it actually is.

primary bedroom - after

The room has a more spacious feeling even though it is a king sized bed (yet fit for a queen), rather than the double bed shown in the before photo.

My goal was to transform this dark cabin into a beach cottage and nothing says cottage more than Roman shades.  The custom velvet upholstered king bed adds a luxurious touch to the room.  With its own private deck overlooking the ocean, the primary bedroom is a relaxing retreat—I could laze here all day and be quite happy.

For more tips on designing a coastal primary bedroom, read this blog post.

Upstairs Guest Room - Before

Renovating a log home

This carpet again took away was absorbing the natural light in the room, as was the dark panelling. 

The plan with this room was to make it a guest room that is warm and inviting for anyone who came to stay.

Upstairs Guest Room - After

This bedroom has been transformed into a bright space that can also function as a home office.

upstairs bathroom - Before

Maybe surprisingly,  I liked the funky colour of the bathtub but the plumbing leaked so the whole thing had to go. 

upstairs bathroom - after

Heated floors, a custom shower and all new fixtures have modernized this small but mighty bathroom.

Main Floor bathroom - Before

My intention was to create a fresh, coastal-inspired space.

main floor bathroom - after

Even with such minor changes, the impact is huge.

The main floor bathroom had minor upgrades with a new floor, low flow toilet as it is on a septic system, and new vanity.  This was more of a cosmetic update and is on the list for a major reno. For now, it’s a fresh bright space.  As a postscript, I learned it’s not advisable to paint logs as they need to breathe.

mudroom - before

I never used this laundry/mudroom sink, so replacing it with a full height cabinet for shoe and cleaning product storage was a much better use of the space.

mudroom - after

Having guests enter the home through a mudroom is never ideal but it’s the only option in the case of The Beach Chalet.  So I decided to at least make it a cheerful entrance with this colourful floor tile.  The exterior colour of my door is an exact match of the lighter blue in the flooring.  My one regret here is that I didn’t install in-floor heating.  Down the road, I would like to enclose the machines with a waterfall countertop with fabric across the front to disguise them.

When I return from beach walks, I unload shells and beach glass from my pockets here.  

main floor guest room - before

Just a lick of paint, new flooring, lighting and baseboard heater has transformed this third bedroom.

main floor guest room - after

Isn’t it amazing how transformative how paint can be?

Basement - Before

The basement before with low ceilings, limited lighting and tiny windows that obstructed the view.  I teach wreath making workshops at Christmas and this photo shows the prep. 

Basement - after

No room has been left untouched.  The ground-floor no longer feels like a basement. Infused with light from big windows and lighter wall colour, I was thrilled to make this my office. The views out these windows are incredible.  I look up from my work to see if I can spot whales.

With three adults sons with fiancees, I wanted them all to have their own space when they’re all visiting at the same time.  Having three bedrooms plus a Murphy Bed in the office, everyone is comfortable.


kitchenette - before

This old basement kitchenette invited tweaking.

kitchenette - after

I didn’t increase the footprint, but the storage and functionality has been improved. When I give guests a tour, no one can resist opening up the retro fridge.  

basement bathroom - before and after

Just kidding – there was no basement bathroom before!

It feels like a different house now.

The view - Before

Where’s the water view?  The trees had grown up to impede the view.

the view - after

And that view has been opened up with some “windowing” of trees.  This has become a three season deck, being covered and having a patio fire table for added warmth when needed.

still to come...

Still to come, painting the scalloped fascia boards white and replacing the railings with glass ones for unobstructed views from the deck. 

I’m forever working on the landscaping and garden as I want a yard full of hydrangeas, truly representing a cottage garden.  My family have been instrumental.  For instance, my youngest brother built my fence and pathway.  Another brings his chainsaw regularly to maintain the views – I’ve since received my own battery chainsaw from my oldest son and his fiancee and am loving it!  My sons have split wood for me when my little splitter couldn’t handle it.  All six brothers built my tenting platform down on the foreshore during an impromptu family reunion.  Growing up I might not have felt so lucky to have six brothers but I sure do now! 

transformation complete

This dark and dated log cabin has quite literally been transformed, into its new life as The Beach Chalet.  

It wasn’t easy, nor was it inexpensive but so worth it for my mental wellbeing.  To summarize, here’s a list of the changes that I made:

  1. Replaced all flooring
  2. Completely gutted one bathroom, created a new one and updated a third
  3. Replaced all windows and doors
  4. Painted EVERYTHING
  5. Brand new kitchen and kitchenette
  6. Some new furniture including dining table and chairs, counter stools, beds and mattresses.  Otherwise I repurposed furniture that I had in my previous home or found some great Marketplace finds.
  7. Installed a modern high efficiency wood- burning insert in the fireplace
  8. The not so pretty stuff: new gutters, new insulation, repaired drainage issues, installed new power pole
  9. New fencing (not shown)

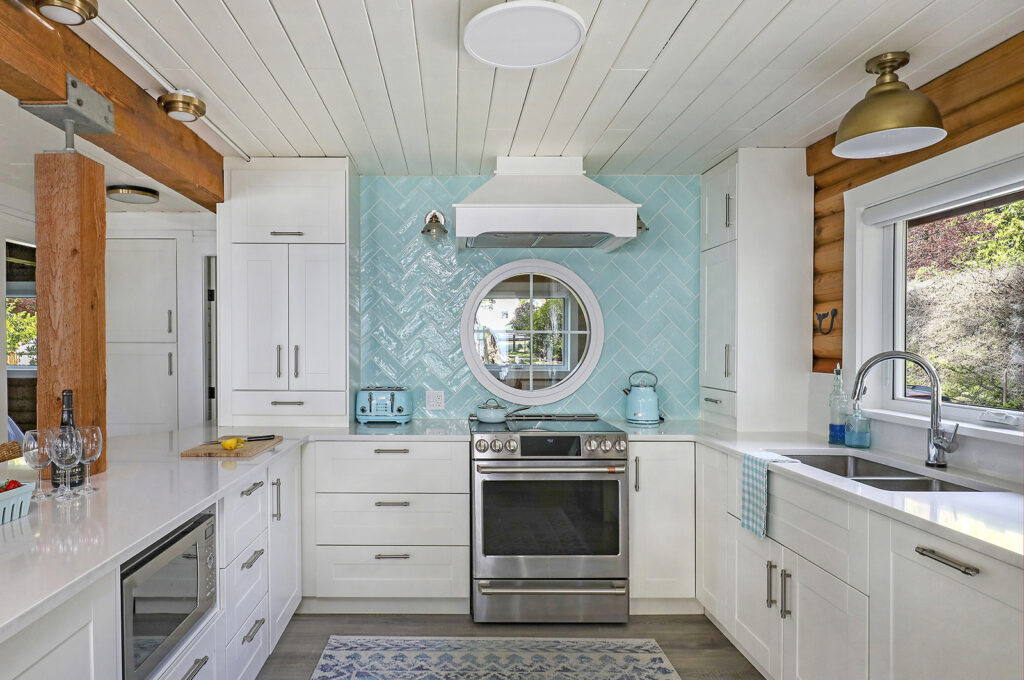
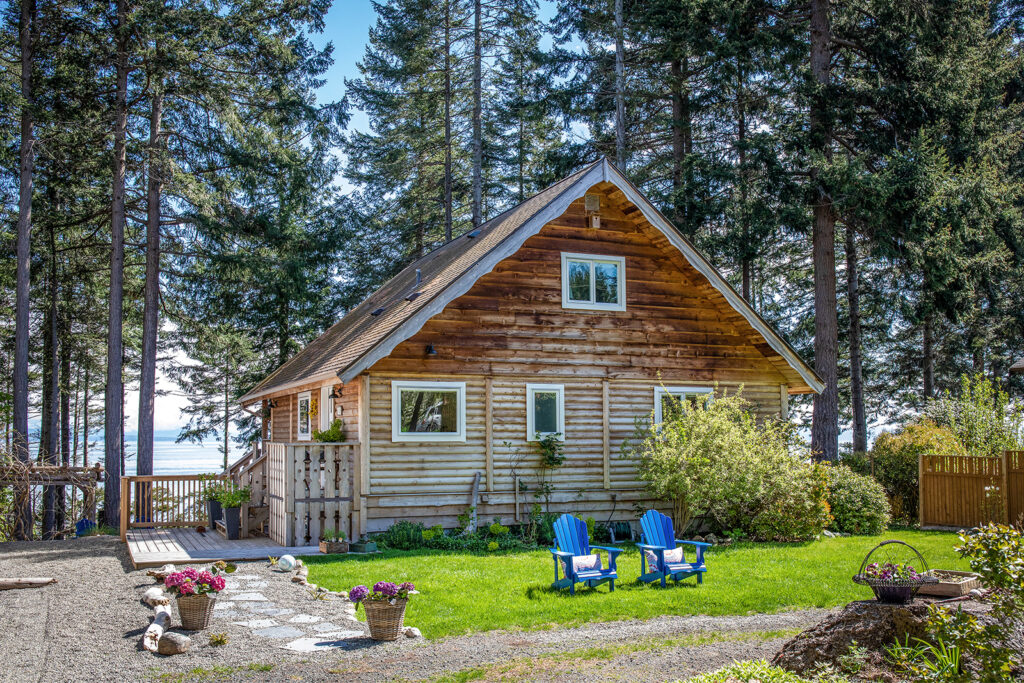
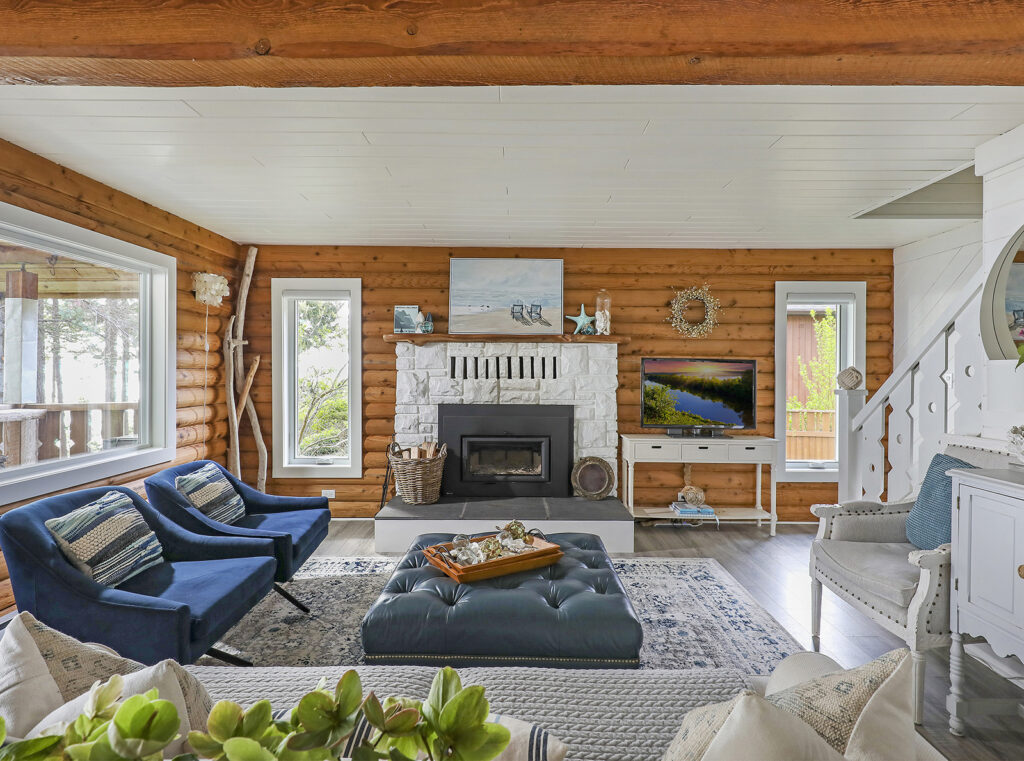
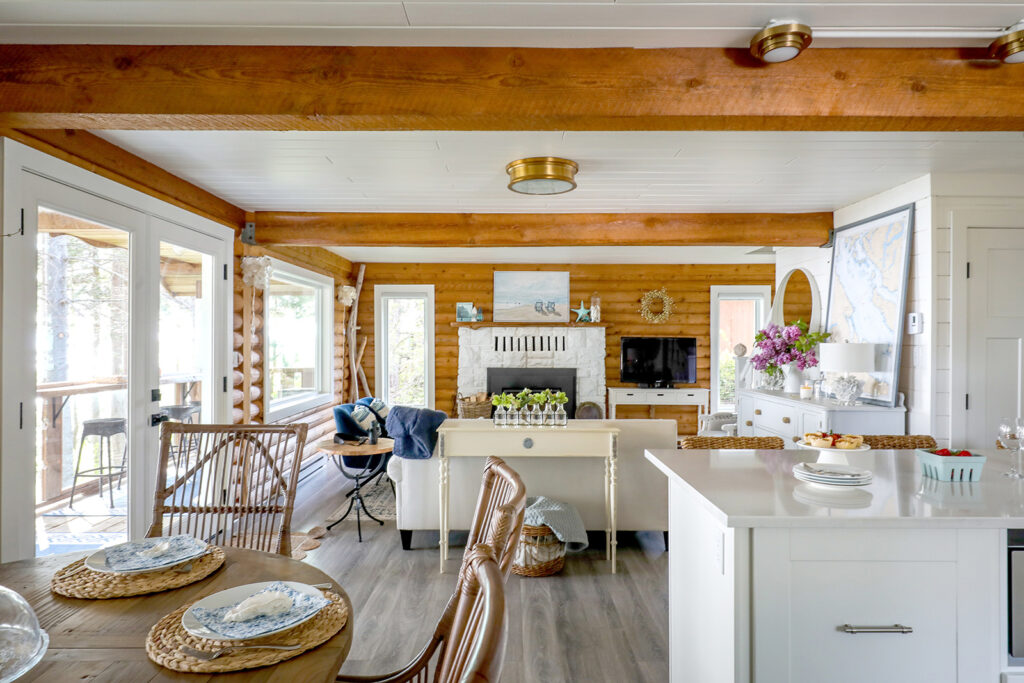
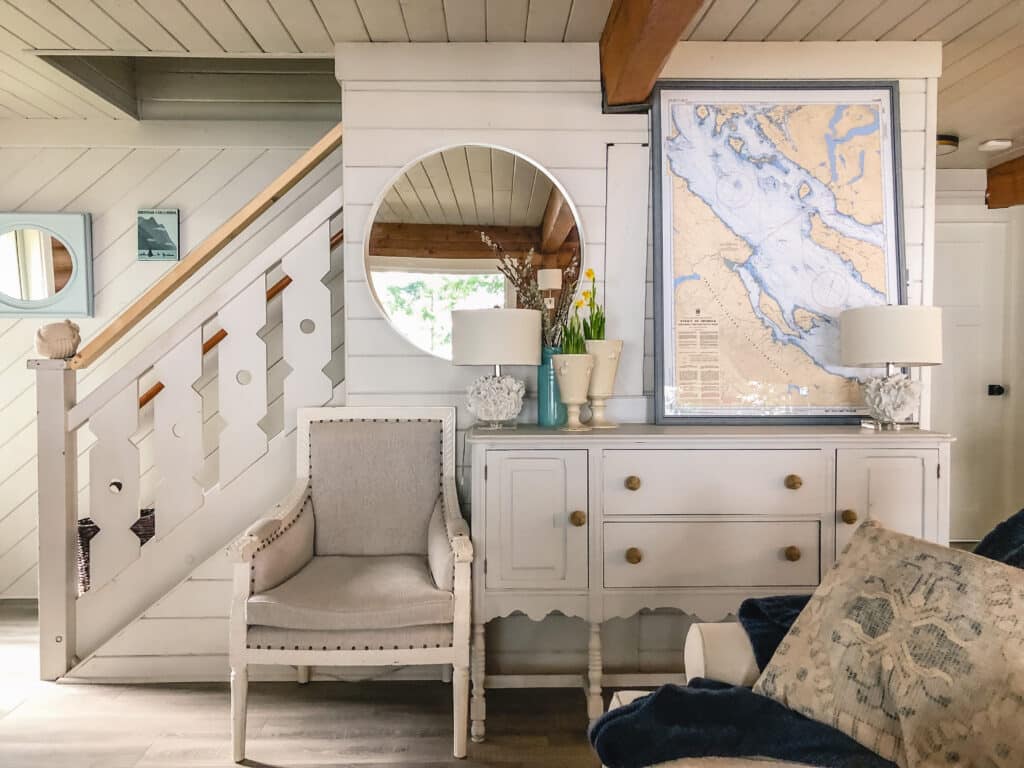
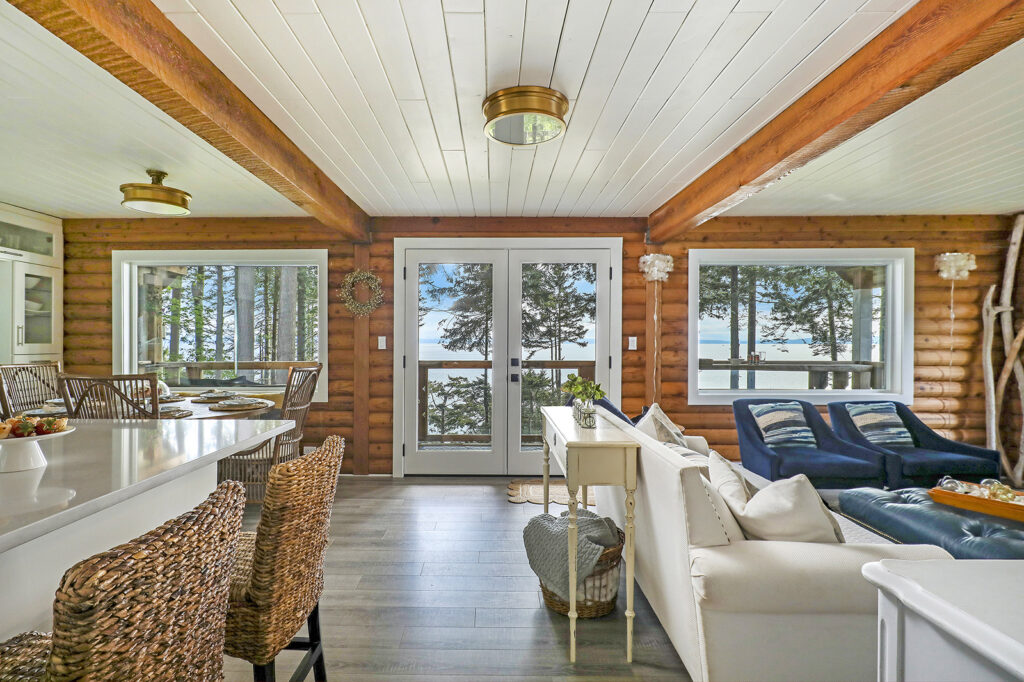
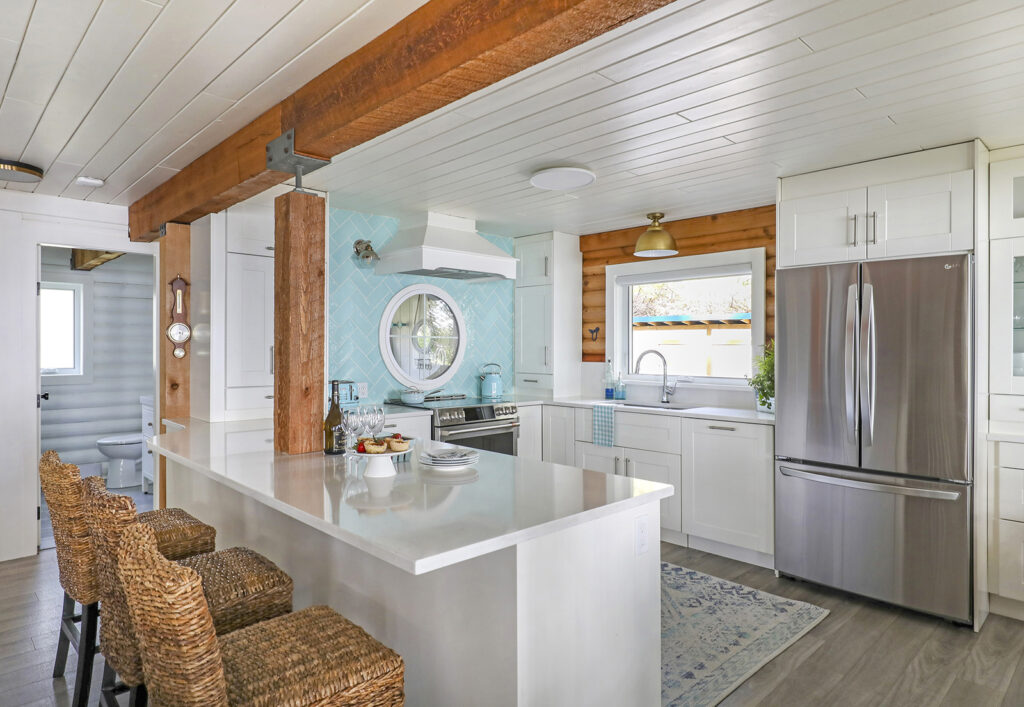
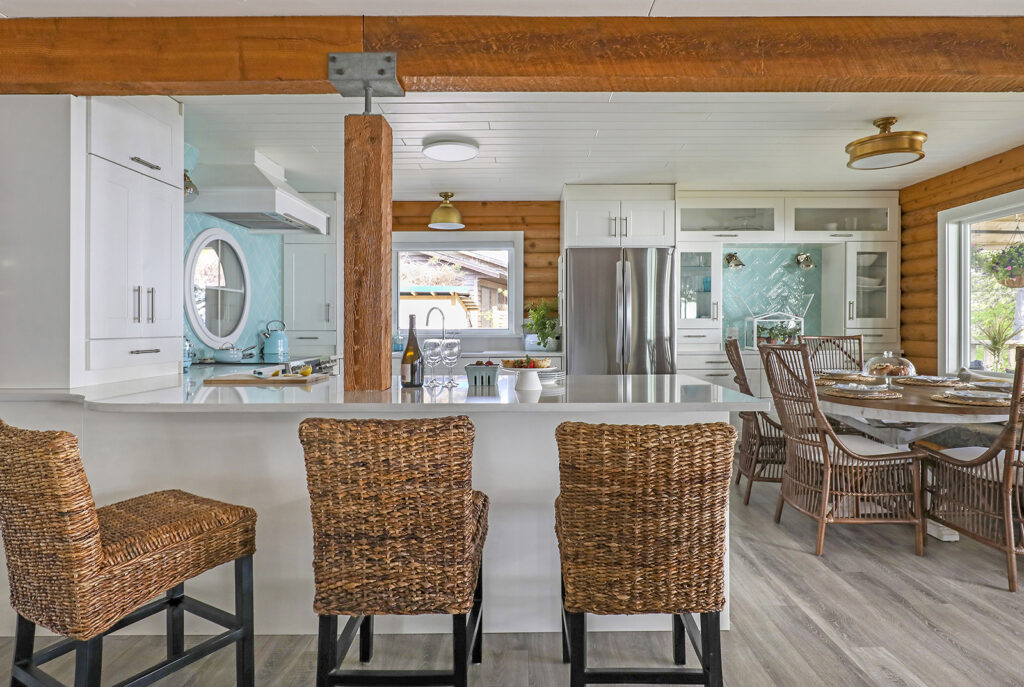
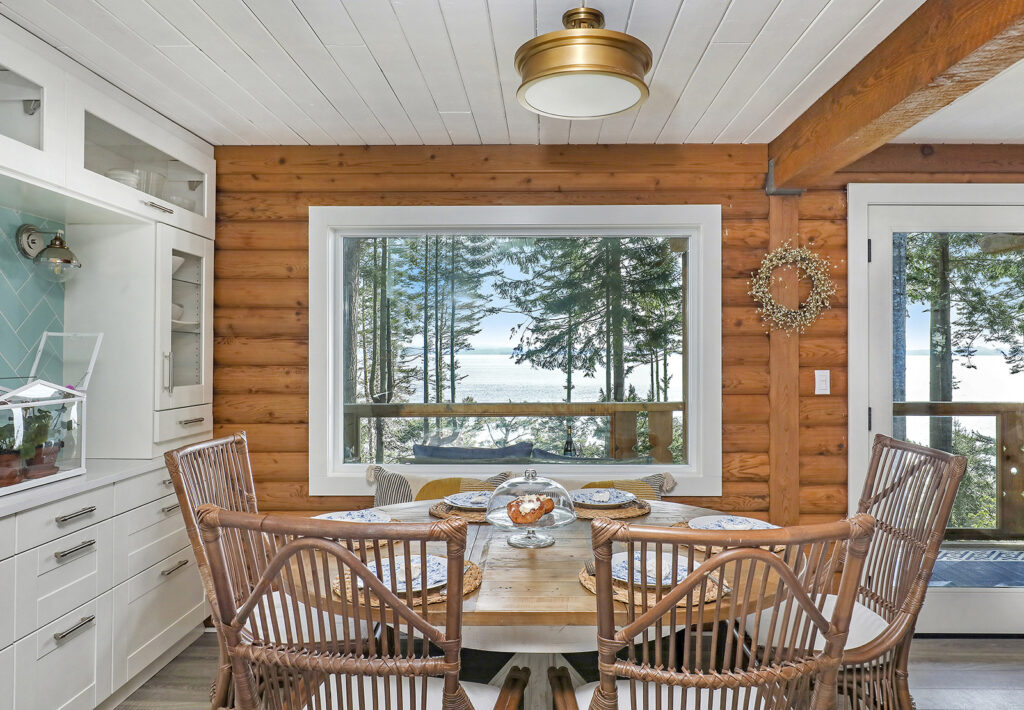
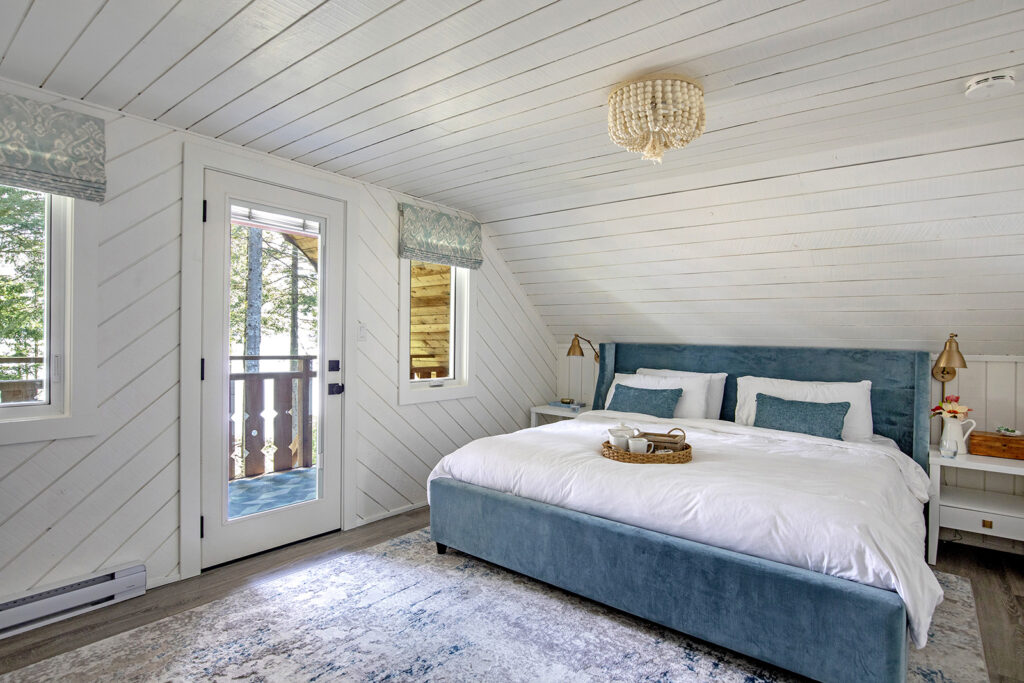
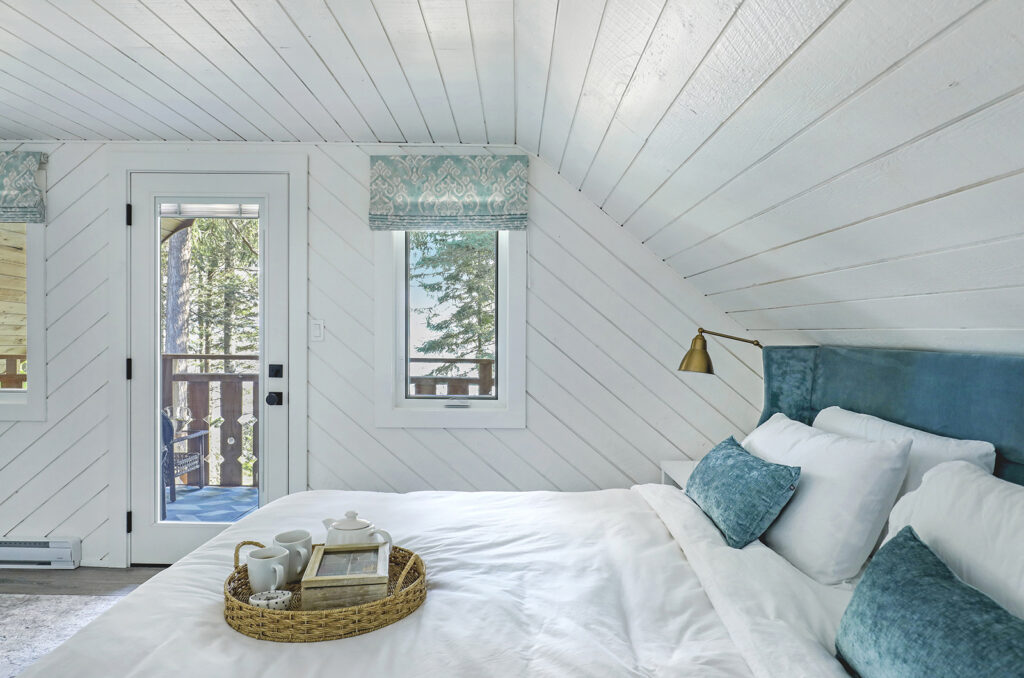
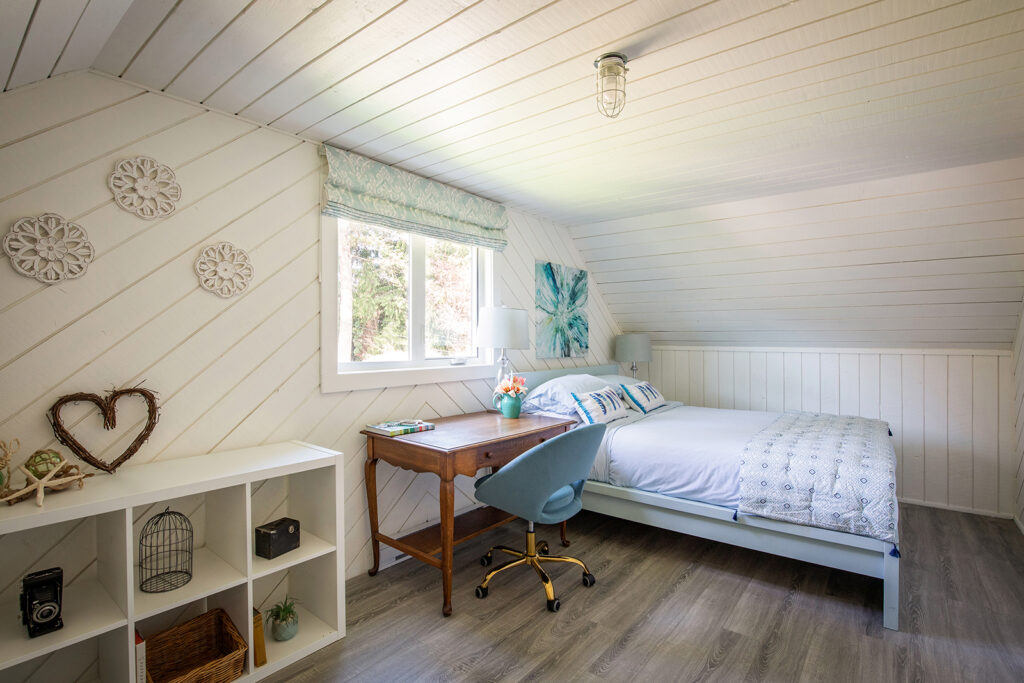
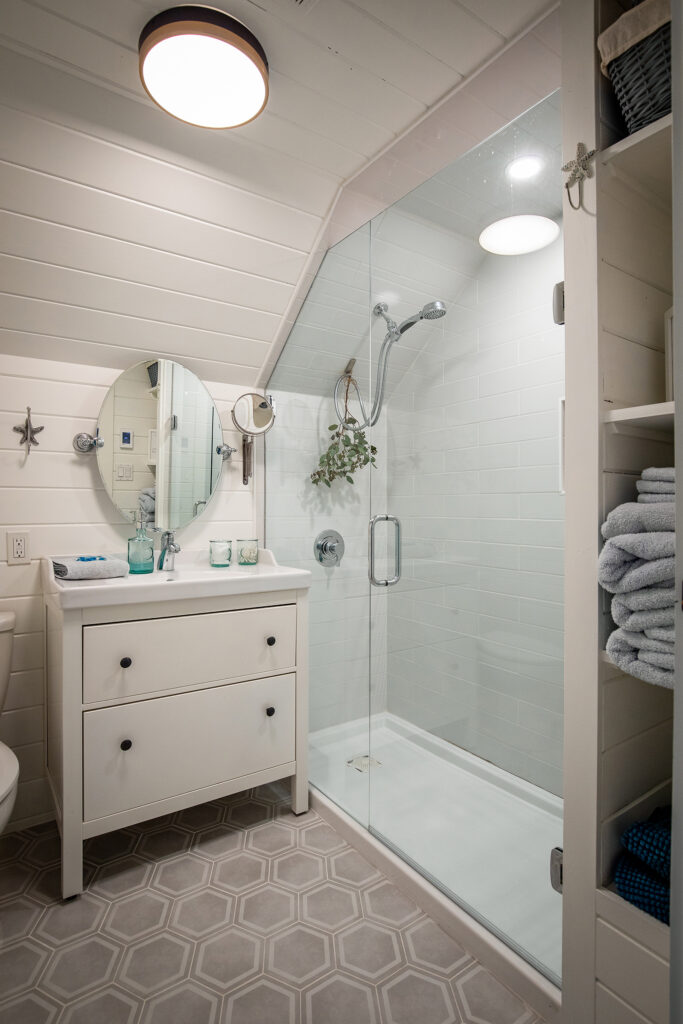
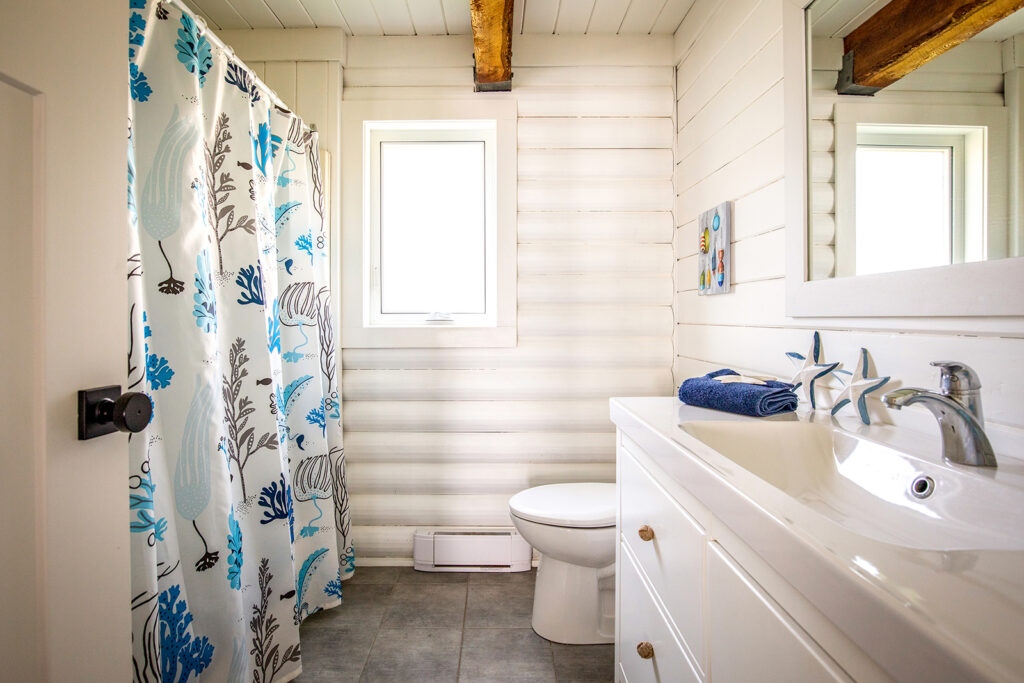
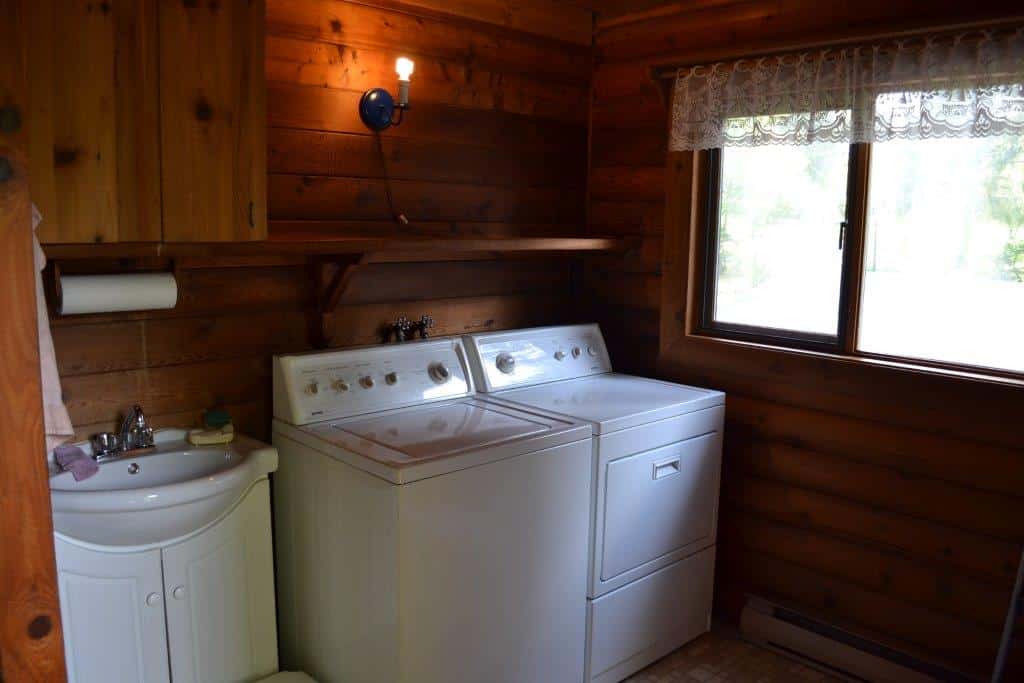
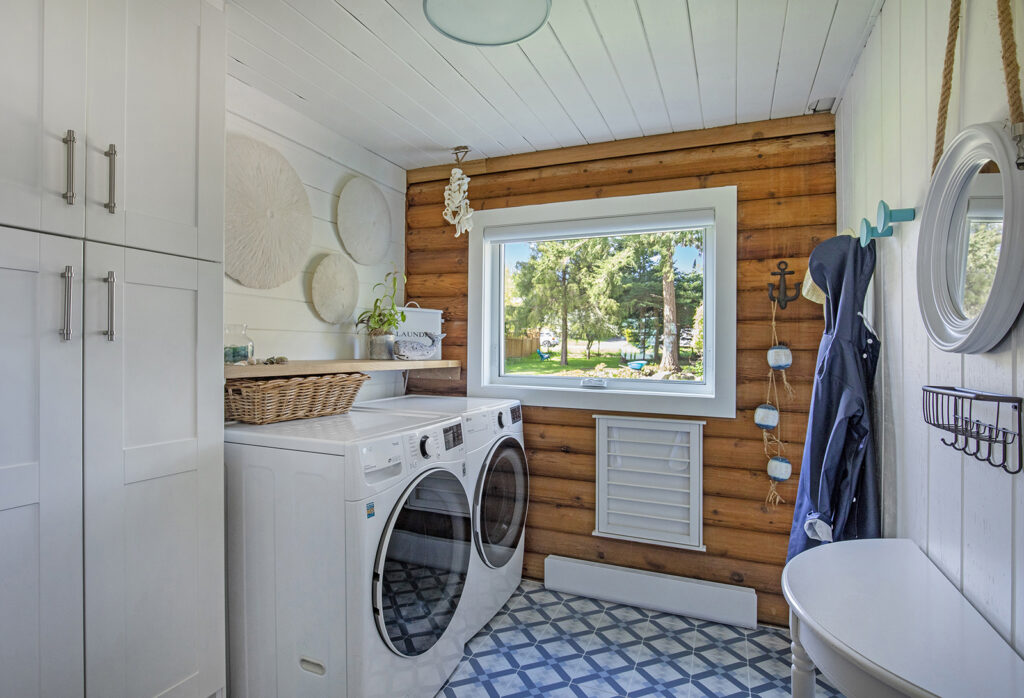
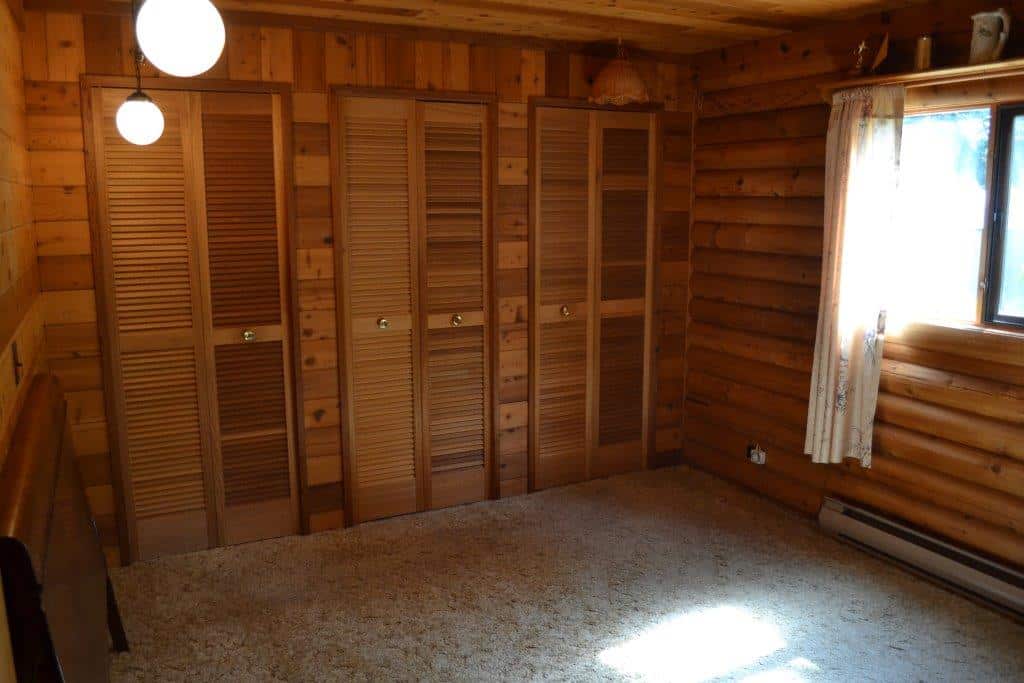
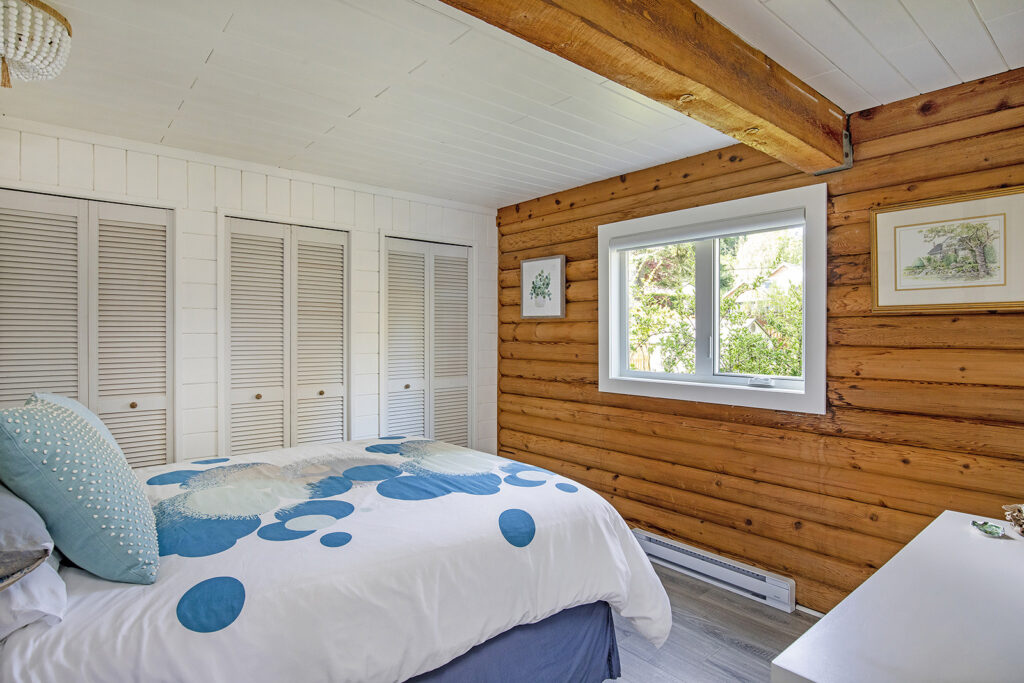
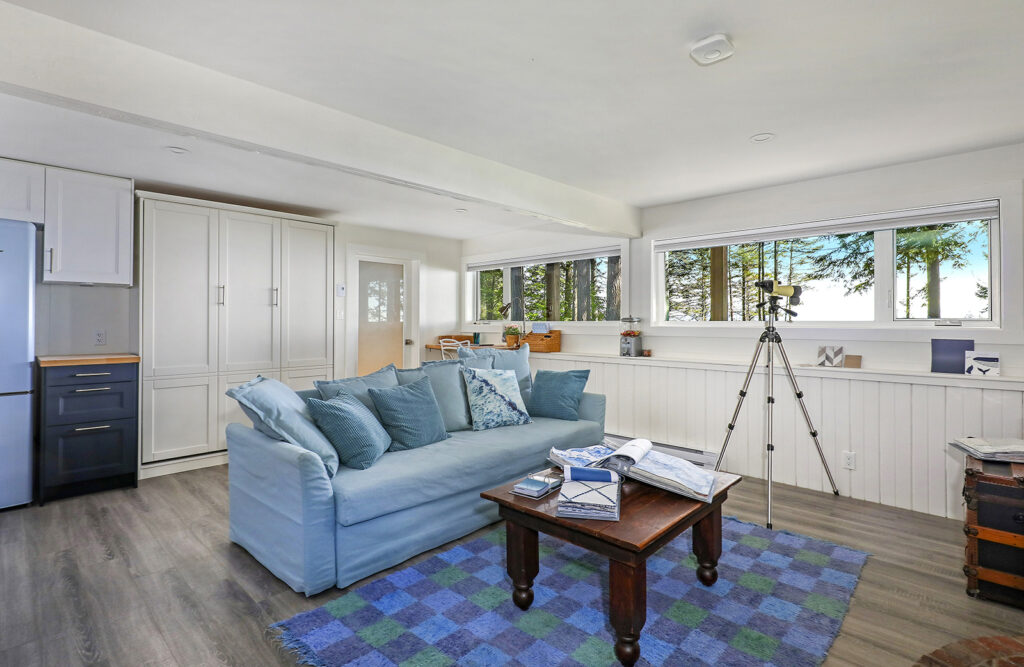
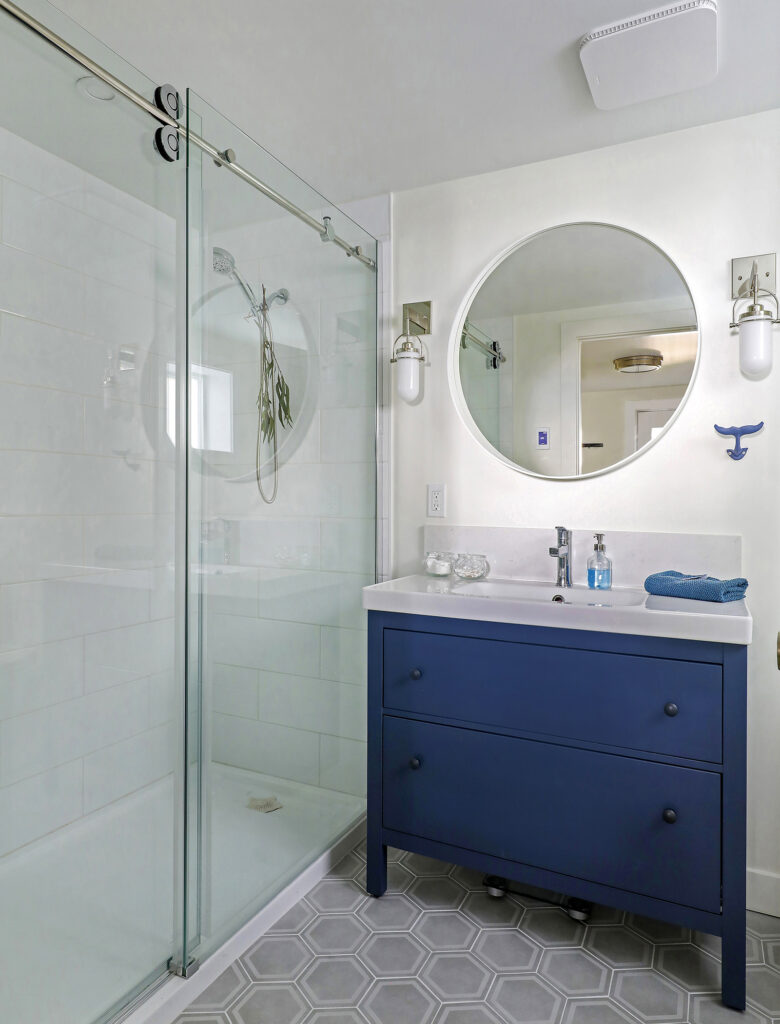
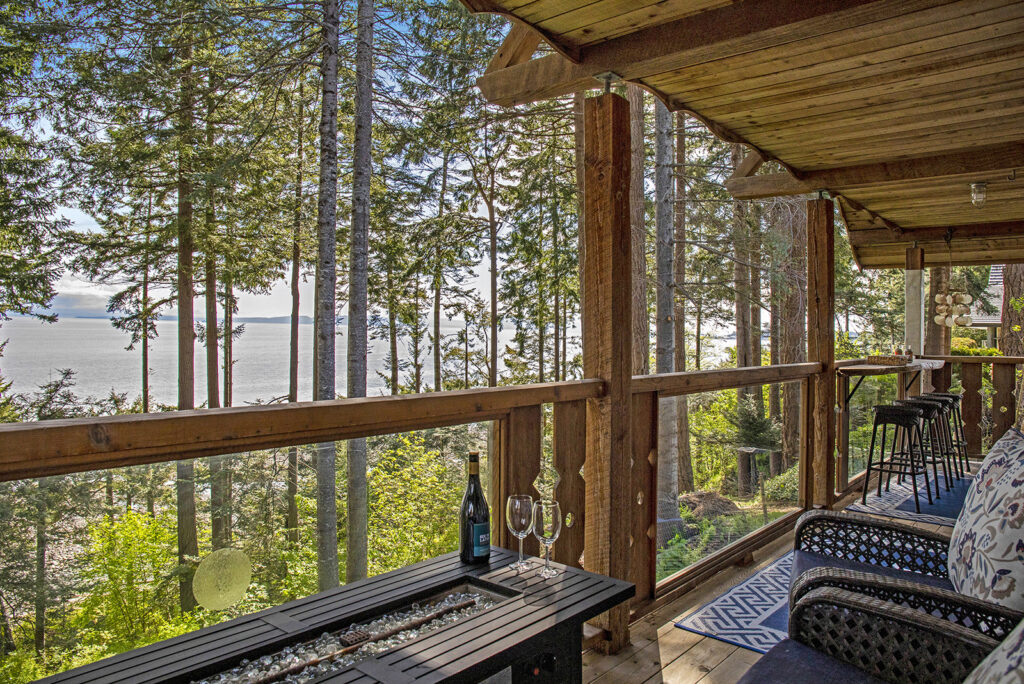
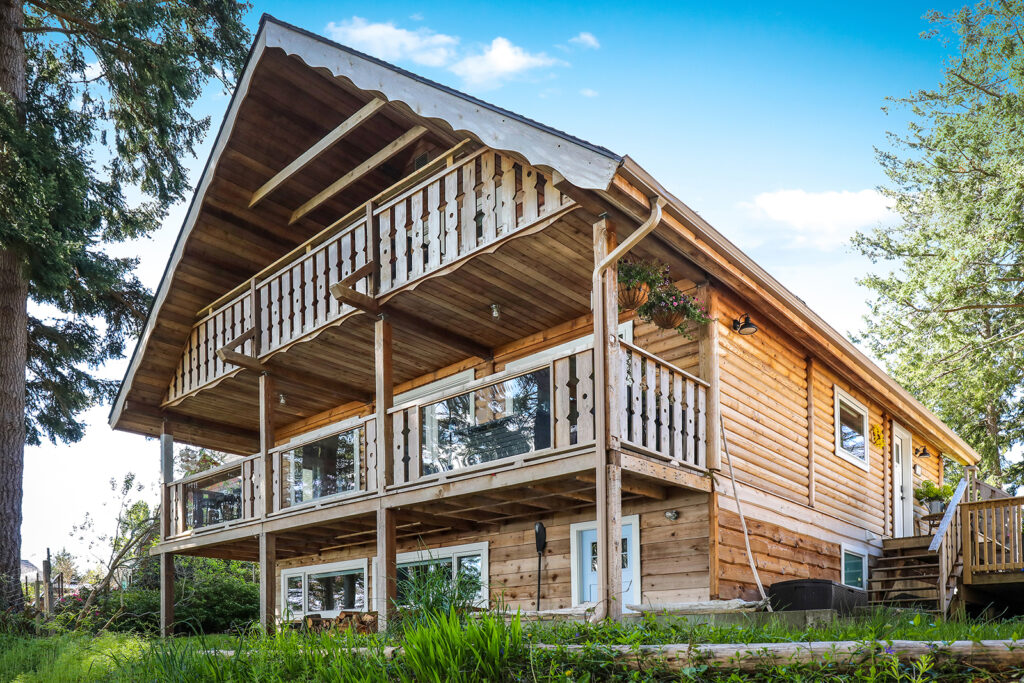
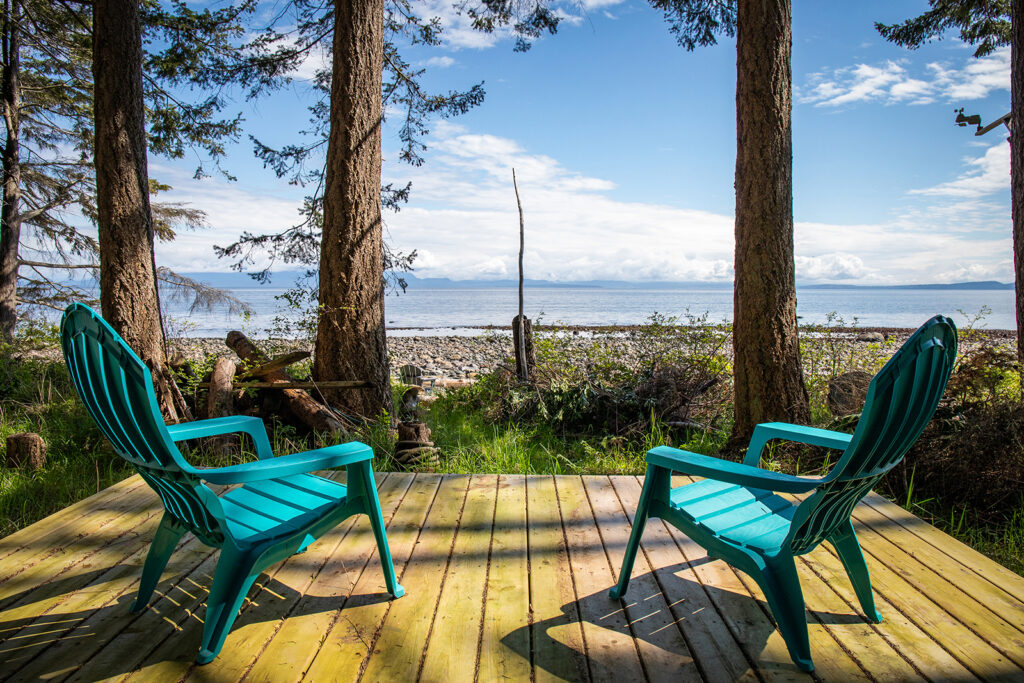
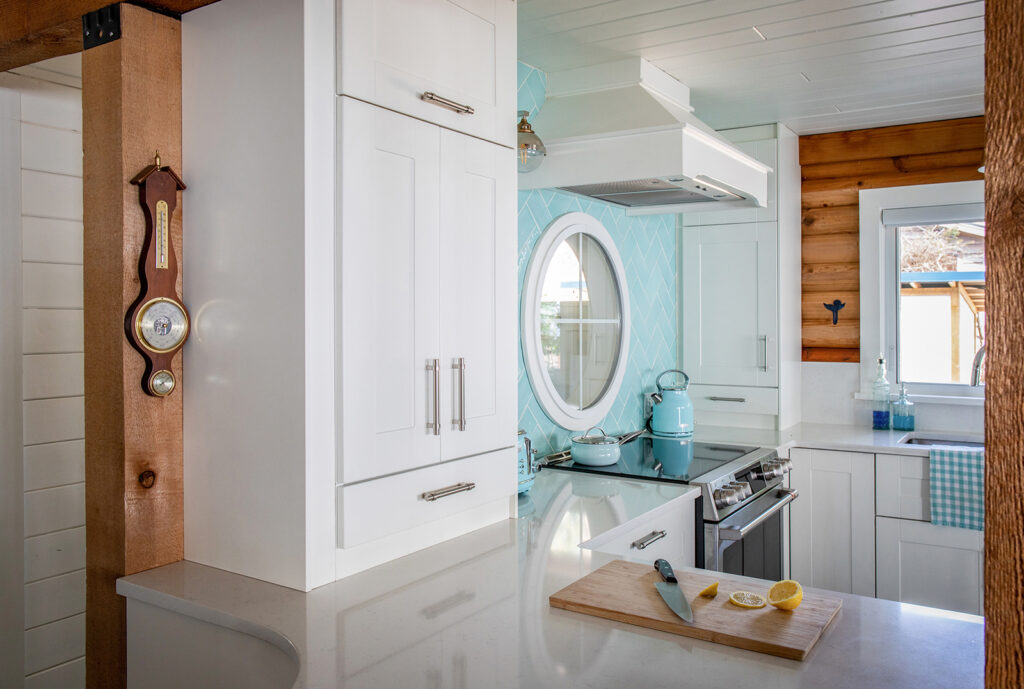
I love the beachy vibe I’ve created as well as the massive increase of light. It truly has become my dream beach cottage, one in which I feel warm, cozy, comfortable and secure.  That’s what a home should be, after all.  My three sons and their partners enjoy visiting, so much so in fact that the youngest is holding his wedding here this May!

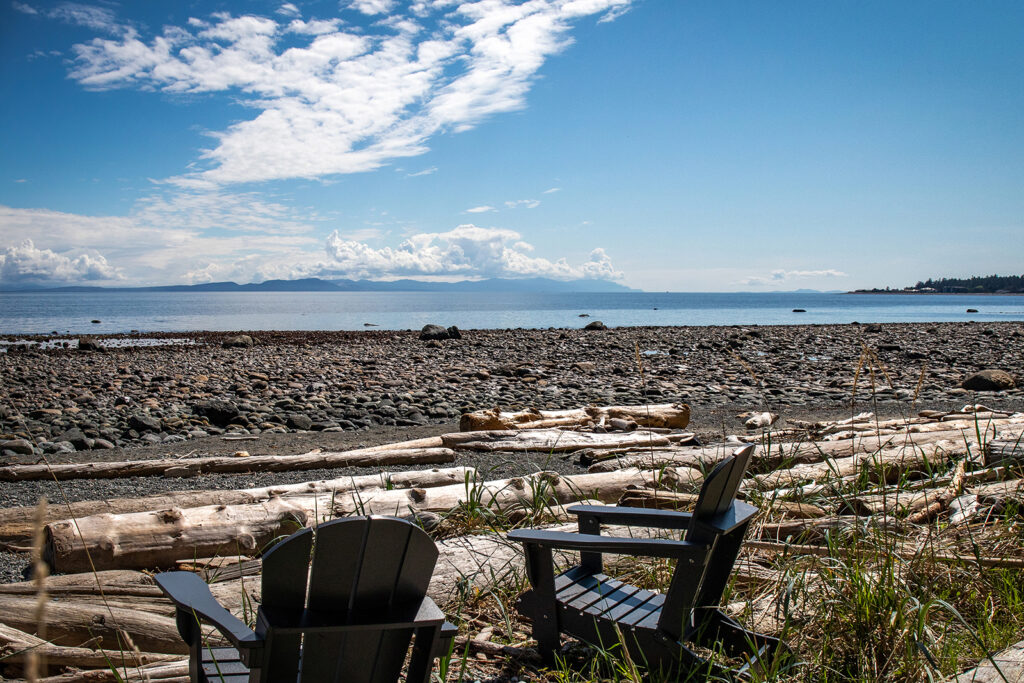
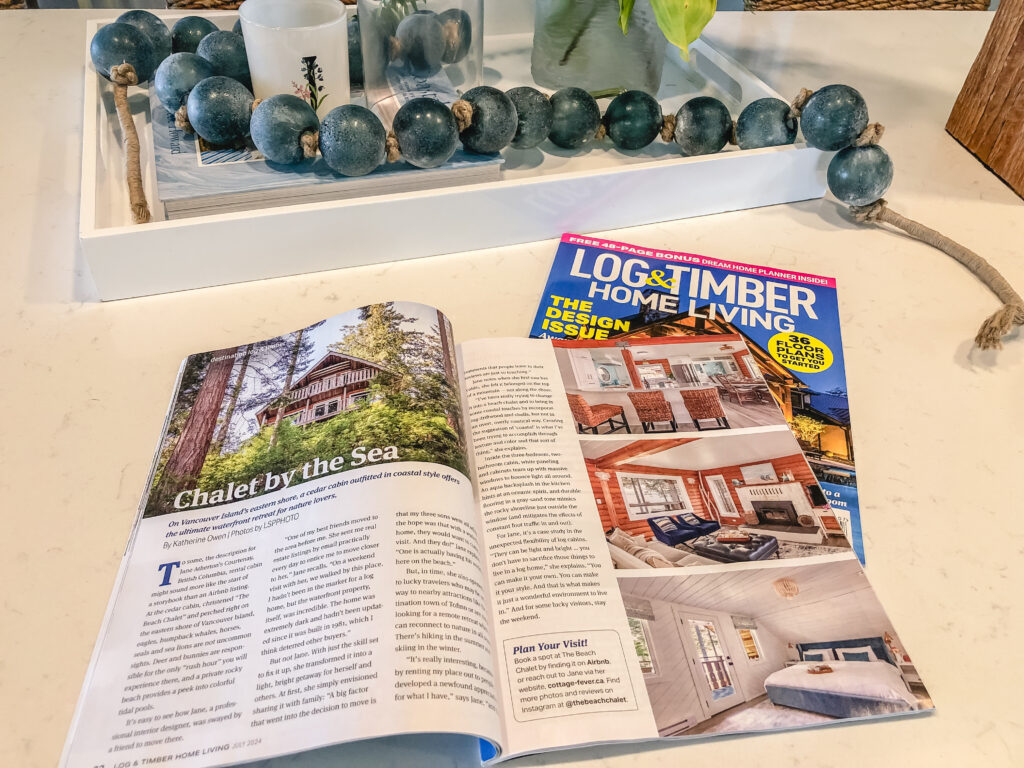
If you have any interest in experiencing The Beach Chalet for yourself, you can see my airbnb listing here.

Are you struggling with how to design the interior of your own log home?  Reach out to me and let’s chat about how I can help.

Thanks for stopping by and feel free to comment below.  Did you like it better before or after? 

Photo credit for all “after” photos: LSP Media

shop my home

This post contains affiliate links